Supabase Setup
Use this guide to bootstrap a fresh Supabase project for Hikyaku before starting the web frontend, scheduler, or server services.
Prerequisites
- A Supabase account(either self hosted or on supabase.com)
- Your local or deployed Hikyaku app URLs
Create a New Supabase Project
- Open the Supabase dashboard and create a new project.
- Pick the organization, project name, region, and database password.
- Wait for the project to finish provisioning.
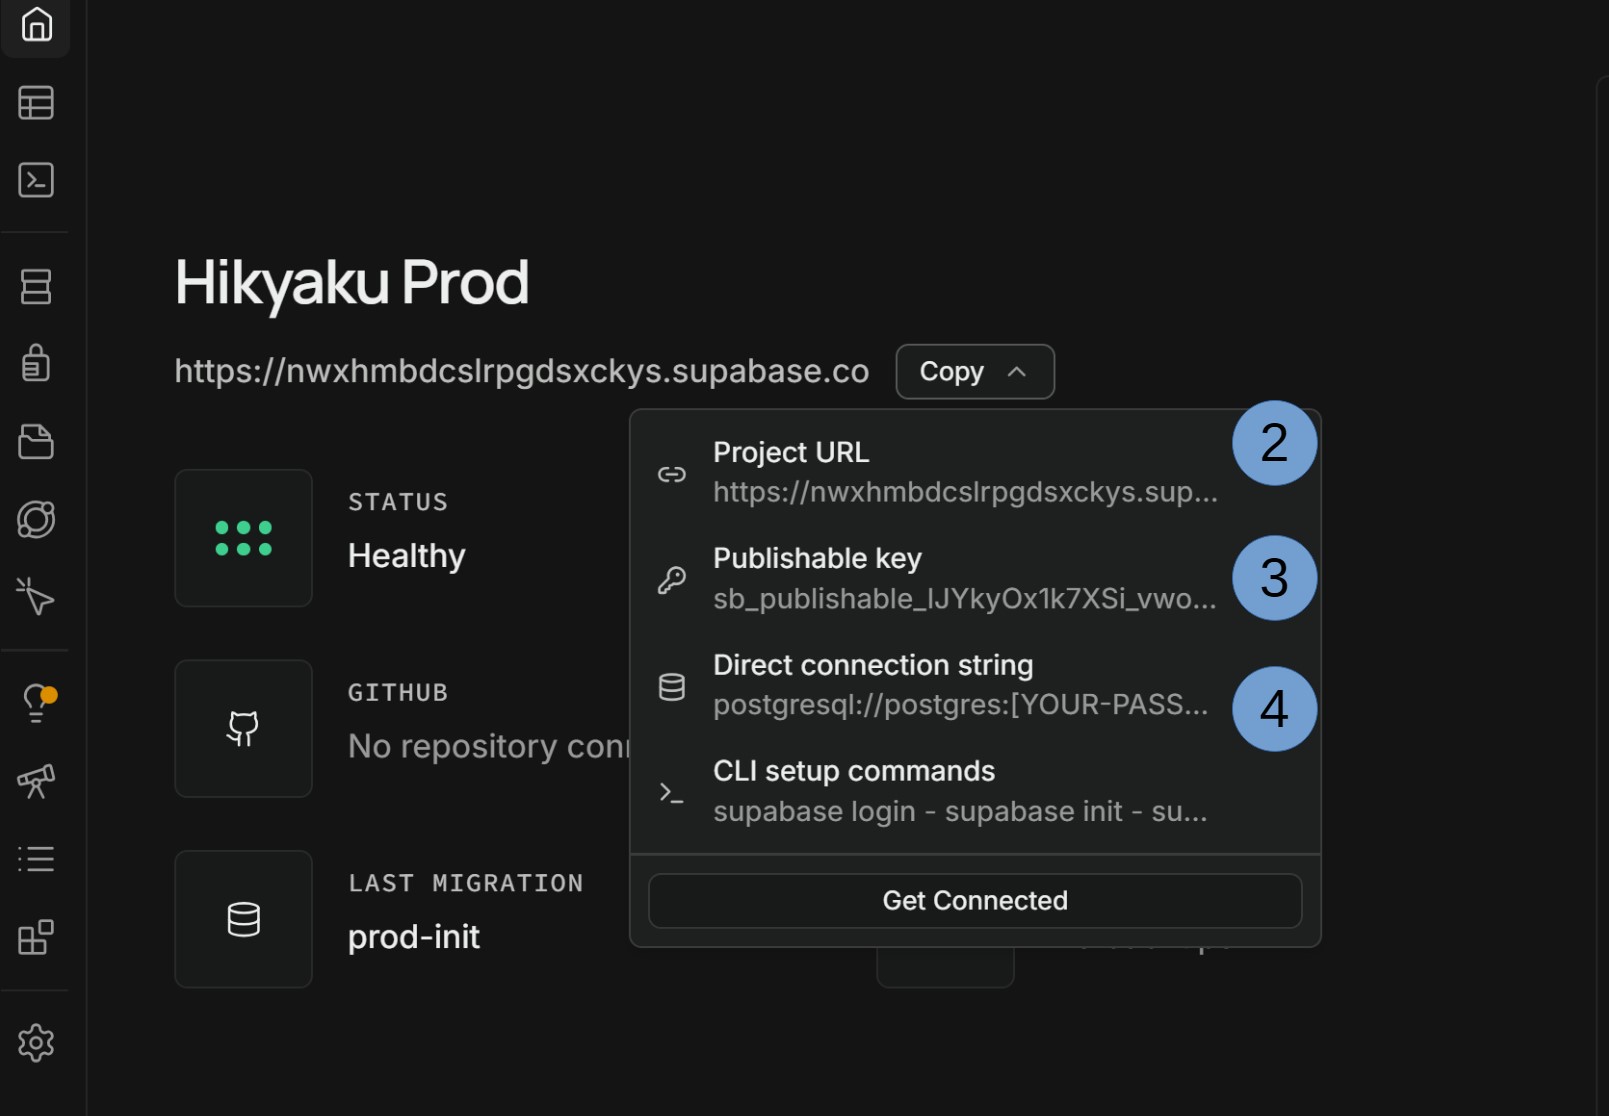
- From Project Overview copy and store these values:
- Project URL
- Publishable key
- Database connection string
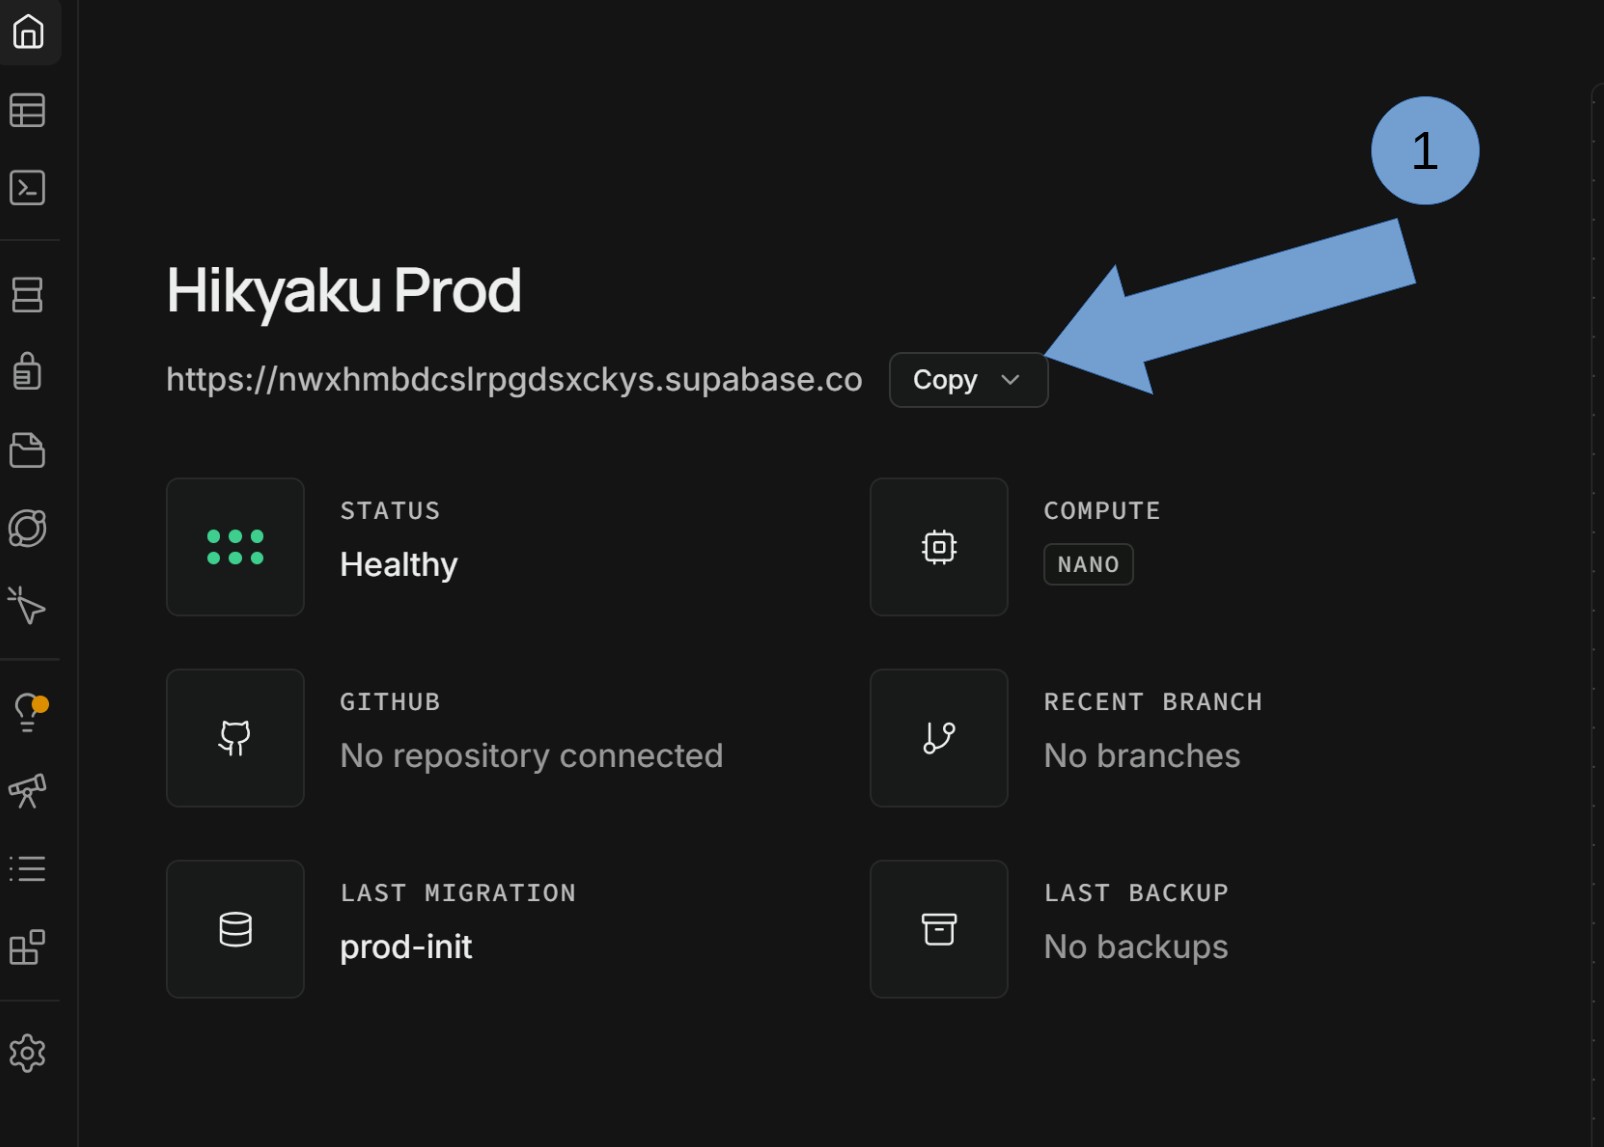
- From Project Settings -> API Keys copy and store the Secret key.
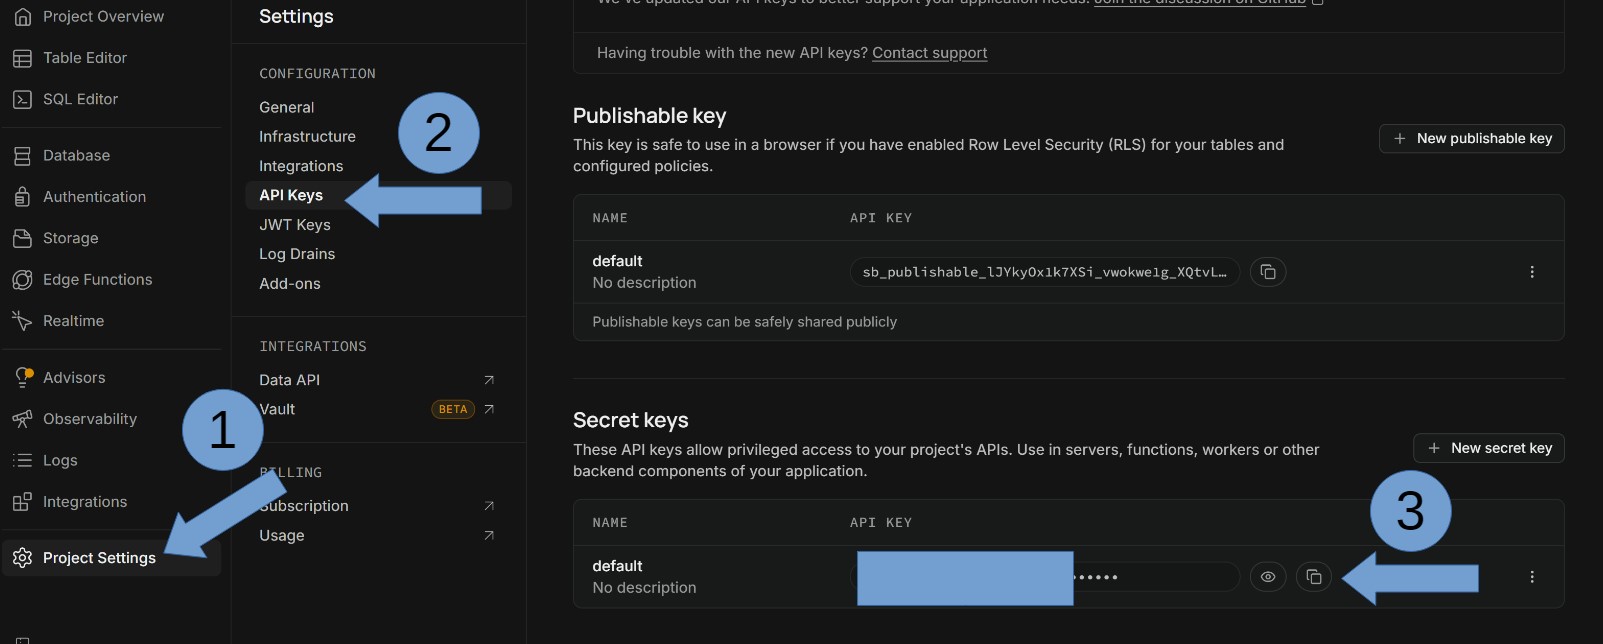
Hikyaku services use the same Supabase project for auth, storage, and the Postgres database, so keep these values available before moving on.
Configure Auth Providers
Hikyaku already uses Supabase Auth for email/password sign-in and password recovery and it includes an OTP confirmation route.
In Authentication -> Sign In / Providers -> Email:
- Enable the Email provider.
- Enable Email + Password.
- Disable Allow annoymous sign-ins
In Authentication -> URL Configuration:
- Set Site URL to your active frontend origin, for example
http://localhost:3000during local development. - Add the Hikyaku auth callback URLs you expect to use, including:
http://localhost:3000/auth/confirmhttp://localhost:3000/auth/update-password
- Add matching production URLs for your deployed frontend.
The current frontend also sends sign-up email redirects using window.location.origin, so the active frontend origin must be present in your Supabase URL configuration.
Enable the OAuth Server
Hikyaku itself acts as an OAuth identity provider so tenants can connect third-party integrations (for example, the Hikyaku n8n node) to their account without ever handing over a password.
In Authentication -> OAuth Server:
- Enable the OAuth 2.1 server.
- Set Authorization Path to
/oauth/consent— this is the route the frontend already implements for the consent screen, and it combines with your Site URL to form the authorization endpoint.
In Authentication -> OAuth Apps:
- Click Add a new client.
- Set Client type to Public — the integrations connect via PKCE, no client secret is used.
- Add the Redirect URI for each integration you plan to support, for example your n8n instance's OAuth callback (
https://<your-n8n-domain>/rest/oauth2-credential/callback). - Click Create and copy the Client ID — integrations like the Hikyaku n8n node need it configured at deploy time.
Post-Setup Checklist
After setup, confirm that:
Once those are in place, you can move on to the web-frontend, server and spatial setup docs.