Run a Shift
A driver runs a shift in this sequence:
Load the van
You must scan each package before you can start the shift. This makes sure that each package on the route is in the van.
- Open the shift. Refer to Open a shift.
- Tap Scan packages at the bottom of the screen.
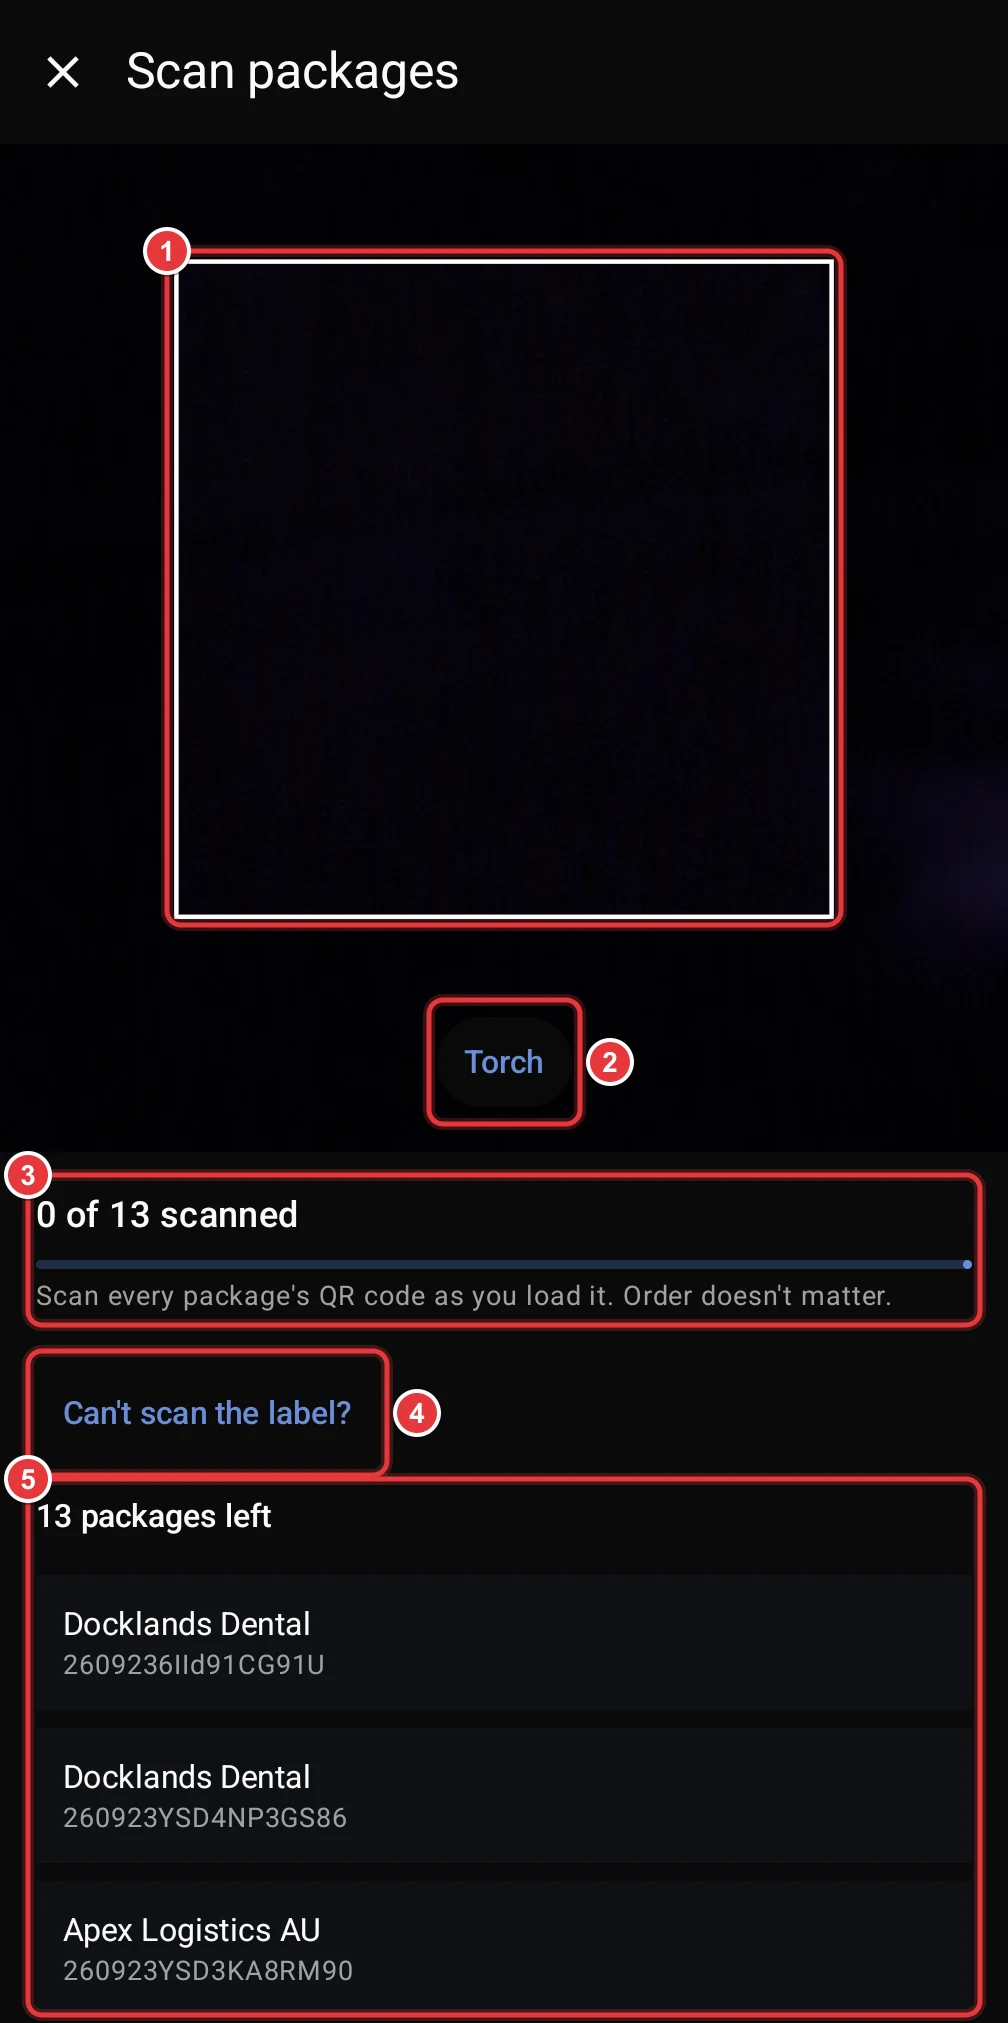
- Hold the QR code of the package label in the camera view. The app reads it automatically. You can scan the packages in any sequence.
- In a dark area, tap Torch to turn on the light.
- The progress bar shows how many packages you scanned.
- If the camera cannot read a label, tap Can't scan the label?.
- Packages left shows the packages that you must still scan.
The app tells you if a code is not a package label, if the package is not on this shift, or if you already scanned it.
Type a tracking number
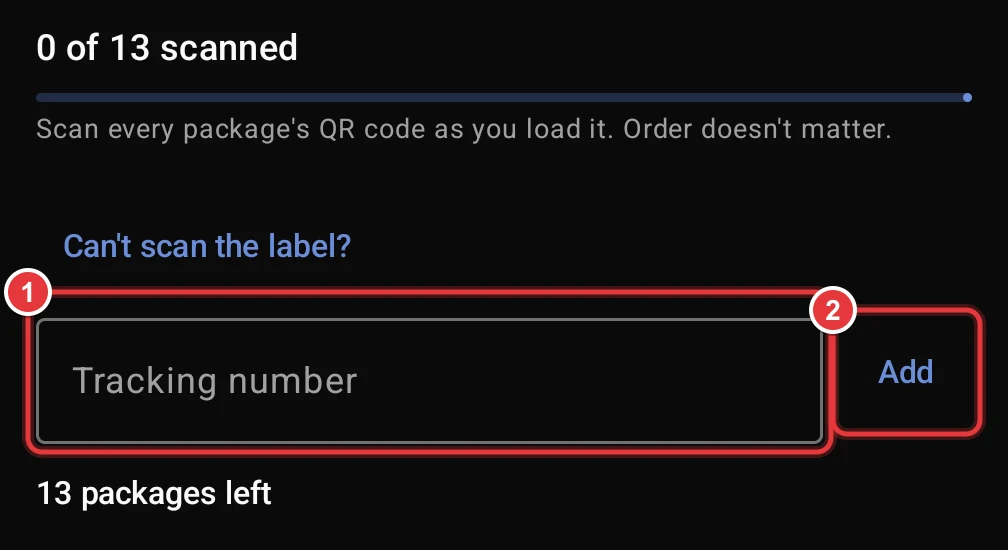
- Type the tracking number from the label.
- Tap Add.
When you scan the last package, the scanner closes. Each package then shows Onboard for Delivery.
Start the shift
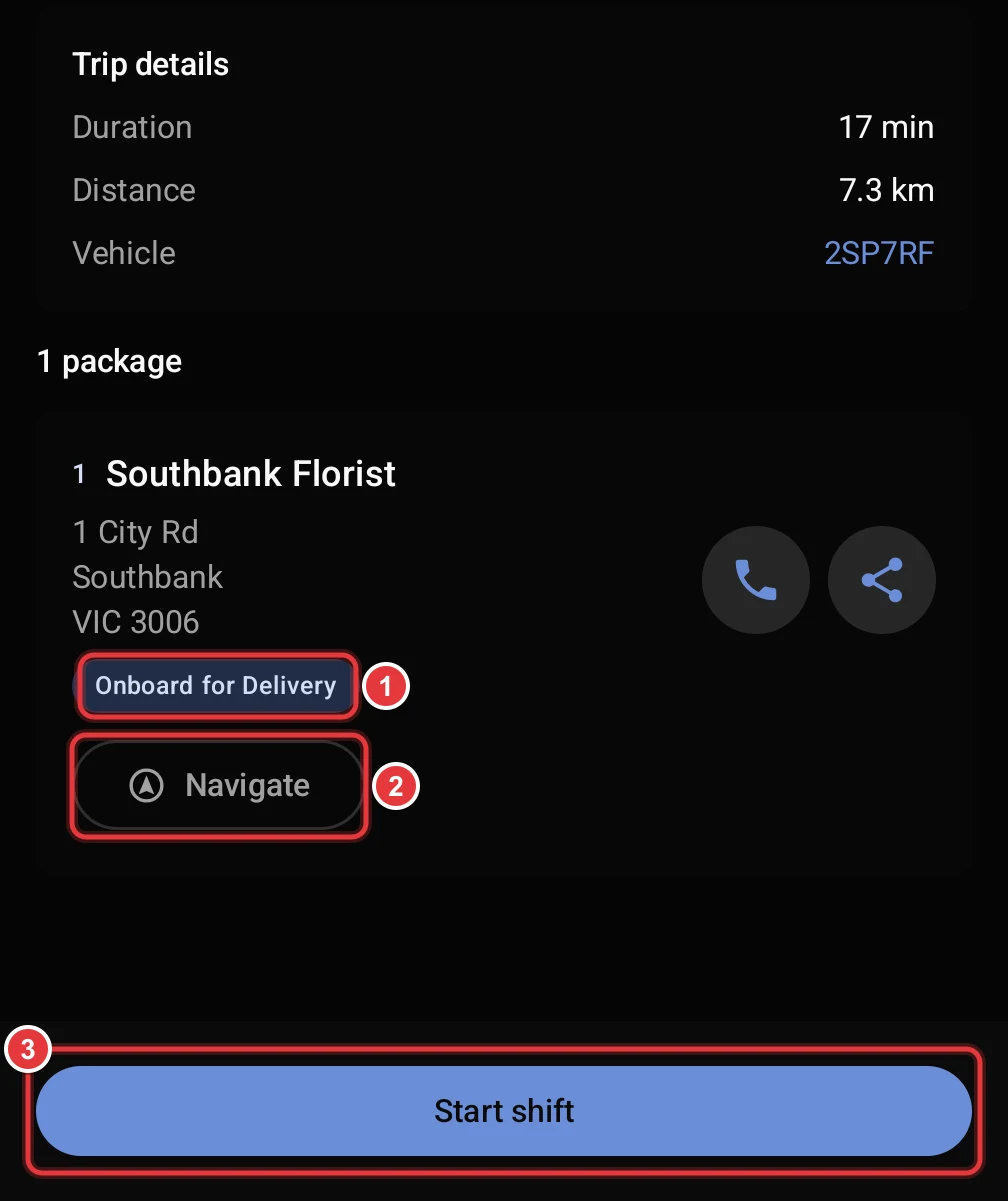
- Each package shows Onboard for Delivery.
- Tap Navigate to open Google Maps with a route to the first stop.
- Tap Start shift.
The first time that you start a shift, the app tells you why it needs two permissions.
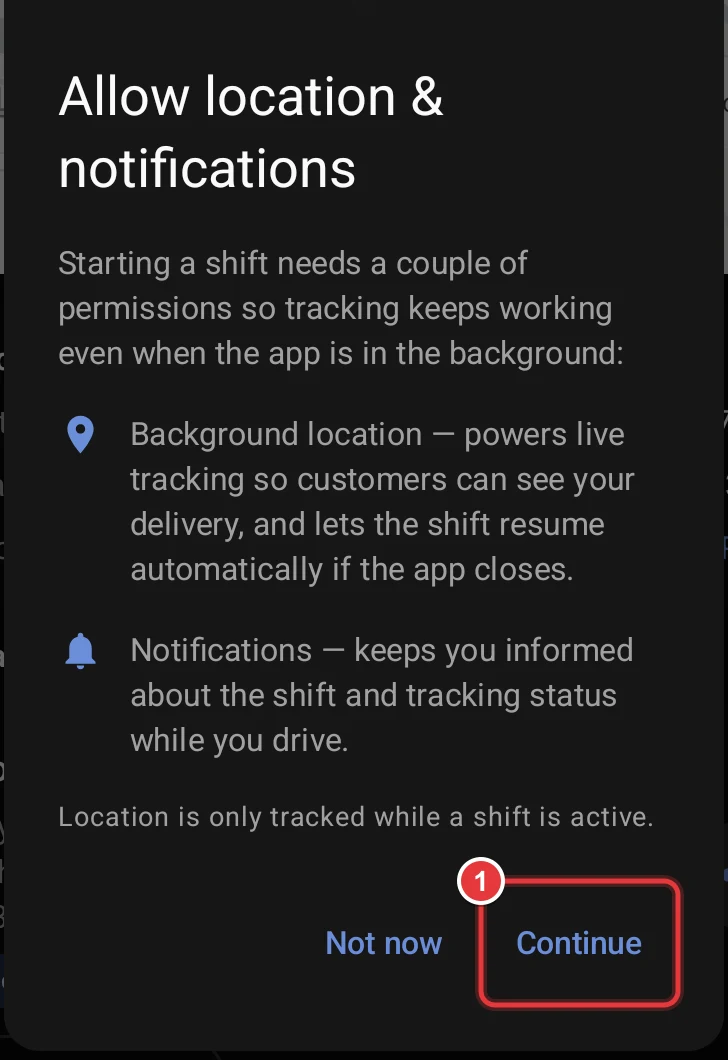
- Read the reasons, then tap Continue.
- In the Android dialogs, set location to Allow all the time and allow notifications.
The app sends your location while the shift is active. Customers see it on the tracking page, and dispatchers see it on the dashboard. If Android stops the app, the app can continue the shift. The app does not send your location when no shift is active.
When the shift starts, the first stop changes to In Transit. The app shows a notification while the shift is active.
Automatic start
If you forget to tap Start shift, the app can start the shift for you. All of these conditions must be true:
- The scheduled start of the shift is between 1 hour before now and 6 hours after now.
- You scanned every package.
- The app saw you at the warehouse.
- You then left the warehouse in a vehicle that moves, or on a bicycle for a bicycle route.
The app then starts the shift and shows a notification. The app needs the location permission for this feature.
Deliver a package
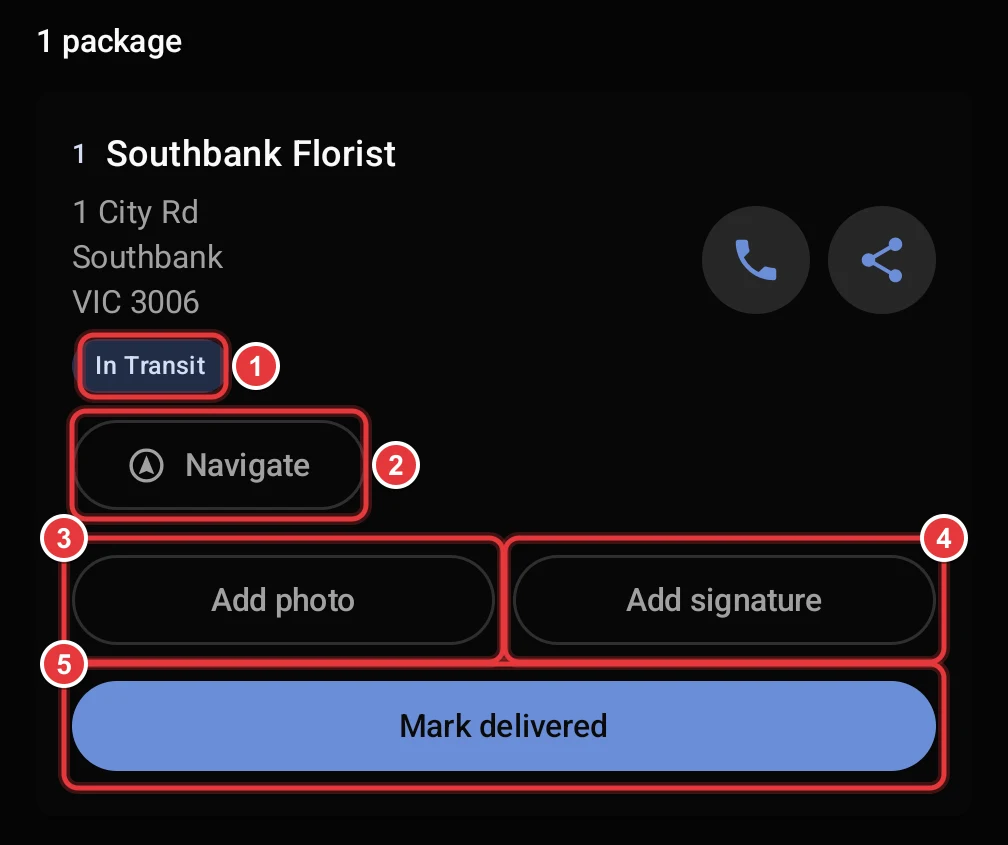
- The status is In Transit.
- Tap Navigate to open Google Maps with a route to this stop.
- Tap Add photo to take a photo of the package at the door.
- Tap Add signature to get the signature of the receiver.
- Tap Mark delivered when the receiver has the package.
The photo and the signature are optional. When you tap Mark delivered, the next stop changes to In Transit.
Use the icons on the stop card to call the receiver or to share a tracking link. The phone number of the receiver does not show on the screen. The tracking message looks like this: "Your delivery from Team Hikyaku is on its way. Track it here: …".
Add a photo
- Tap Add photo. The camera opens.
- Take the photo and accept it.
The app shows the photo and a Photo description field. On supported phones, the app writes a description of the photo. The phone makes the description itself, so the photo does not go to an AI service. You can change the text. When you leave the field, the app corrects the words and the grammar.
The app adds the GPS position to the photo. If the phone has no network, the app keeps the photo and sends it later.
Add a signature
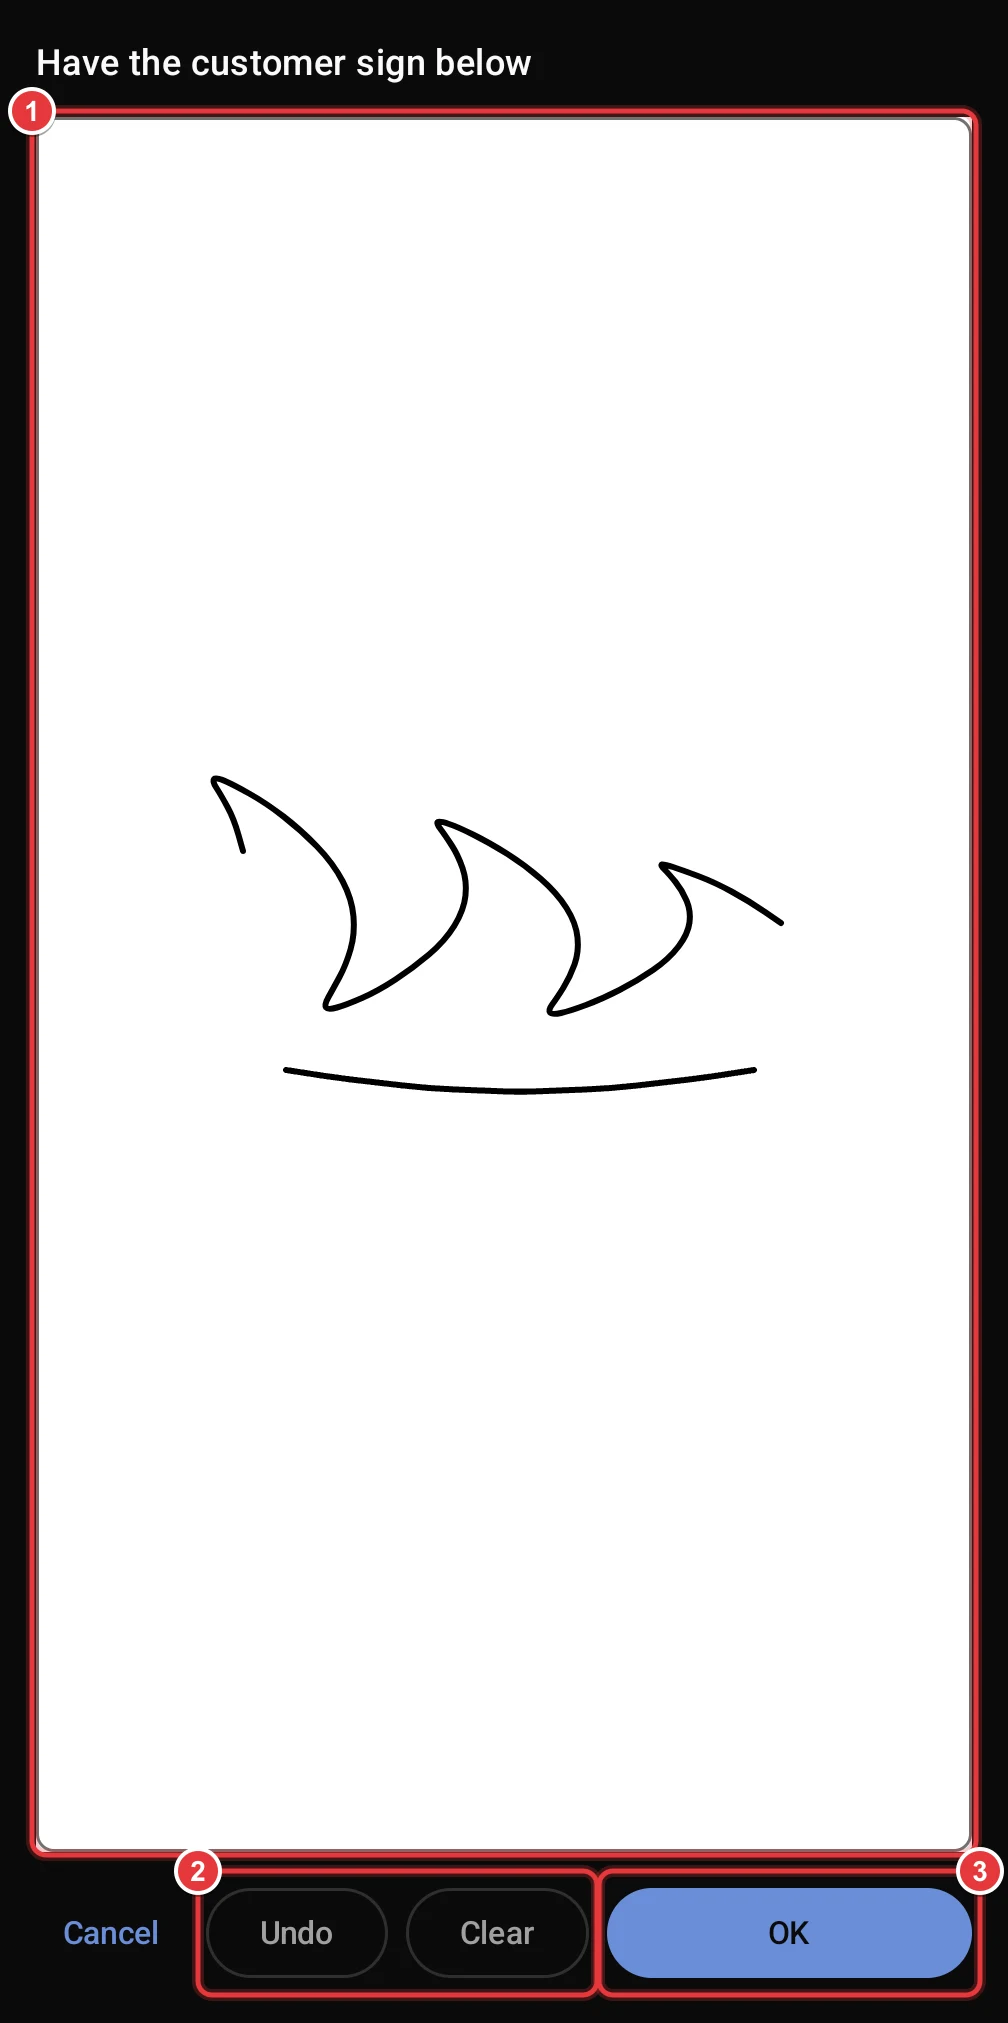
- Give the phone to the receiver. The receiver signs in the white area.
- Tap Undo to remove the last line. Tap Clear to start again.
- Tap OK.
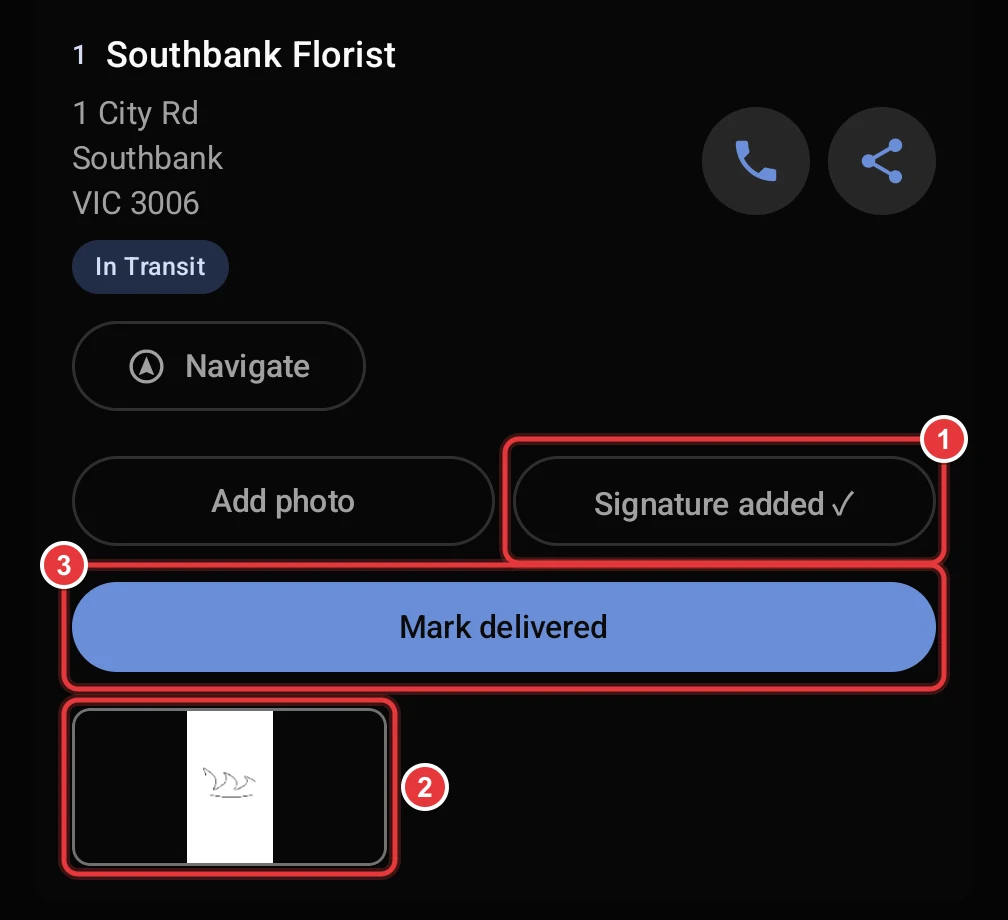
- The button changes to Signature added ✓.
- The app shows a small copy of the signature.
- Tap Mark delivered.
After Hikyaku records a signature, nobody can change it or replace it.
After the last stop
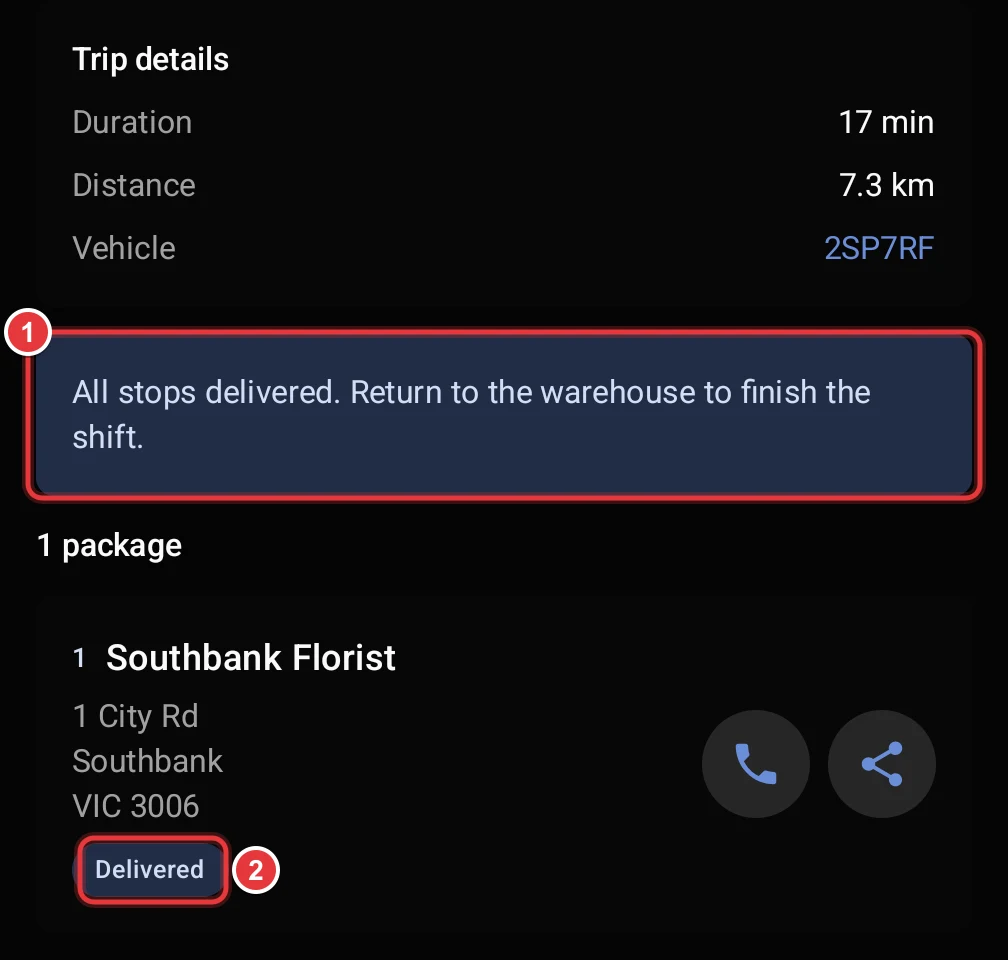
- The banner tells you to go back to the warehouse.
- The stop shows Delivered.
When you arrive at the warehouse, the app ends the shift. It stops the location updates and shows Shift complete — you're back at the warehouse. Tap View your route to see the route that you drove on a map. On the dashboard, dispatchers see the recorded locations in the location history on the driver page.