Team Members and Drivers
A team member is a person in your organisation, for example a dispatcher or a driver. A team member with the role Driver also has a driver profile. The planner can give work only to drivers.
Who can use this page: team members with team_members.view. To add or change people, you must have team_members.add or team_members.edit. For roles and permissions, refer to Access Control.
See the team
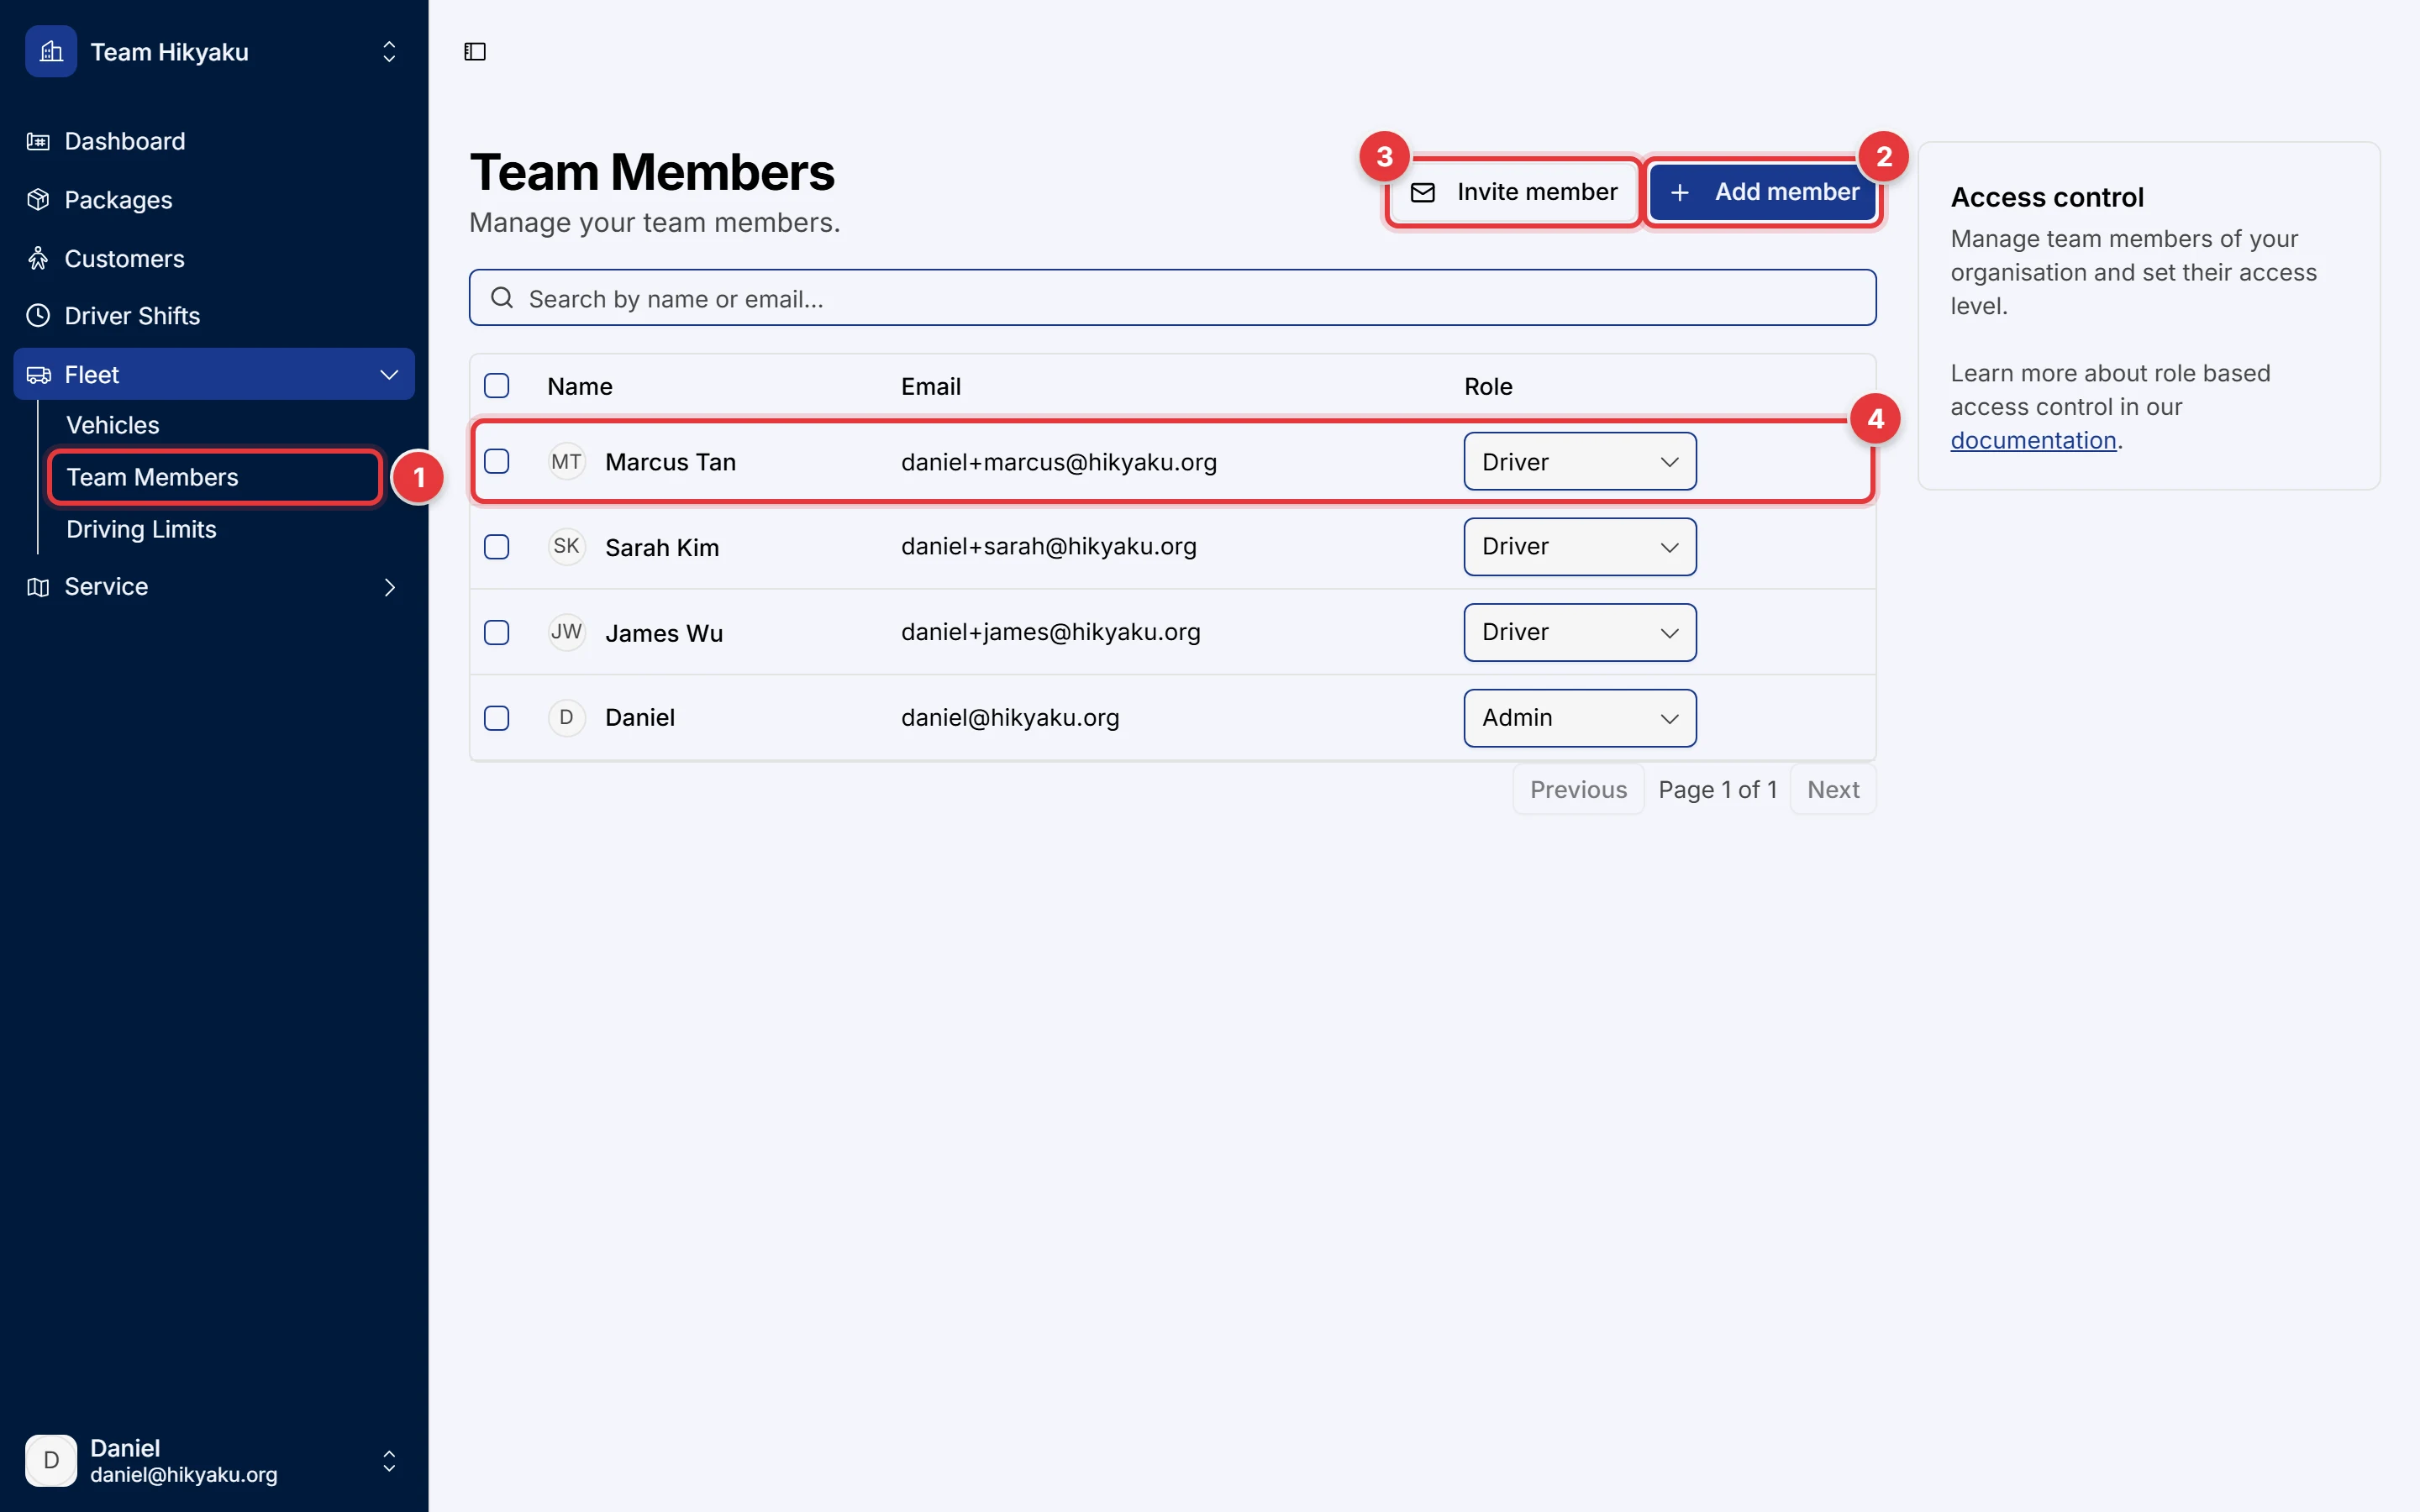
- In the sidebar, click Fleet, then click Team Members.
- Click Add member to add a person and type all their details yourself.
- Click Invite member to send an email invitation. Type the email, select the role and the permissions. The person makes their own account when they accept.
- Click a row to open the person's page.
Each row shows the name, the email and the role. Use the search field to find a person by name or email.
Add a driver
- Click Add member.
- Type the Display Name, the Email and the Phone Number.
- In Role, select Driver. The form shows Driver Licensing Details.
- Type the Driving License number and select the License Expiry, the Country of Issue, Under Probation and the License Type.
- A driver does not need extra permissions. Refer to What drivers get automatically.
- Click Add Team Member.
Hikyaku sends an email invitation to the new driver. The driver then signs in to the driver app.
For all roles other than Driver, the role is only a label. Access comes from the permission checkboxes. Refer to Access Control.
The driver page
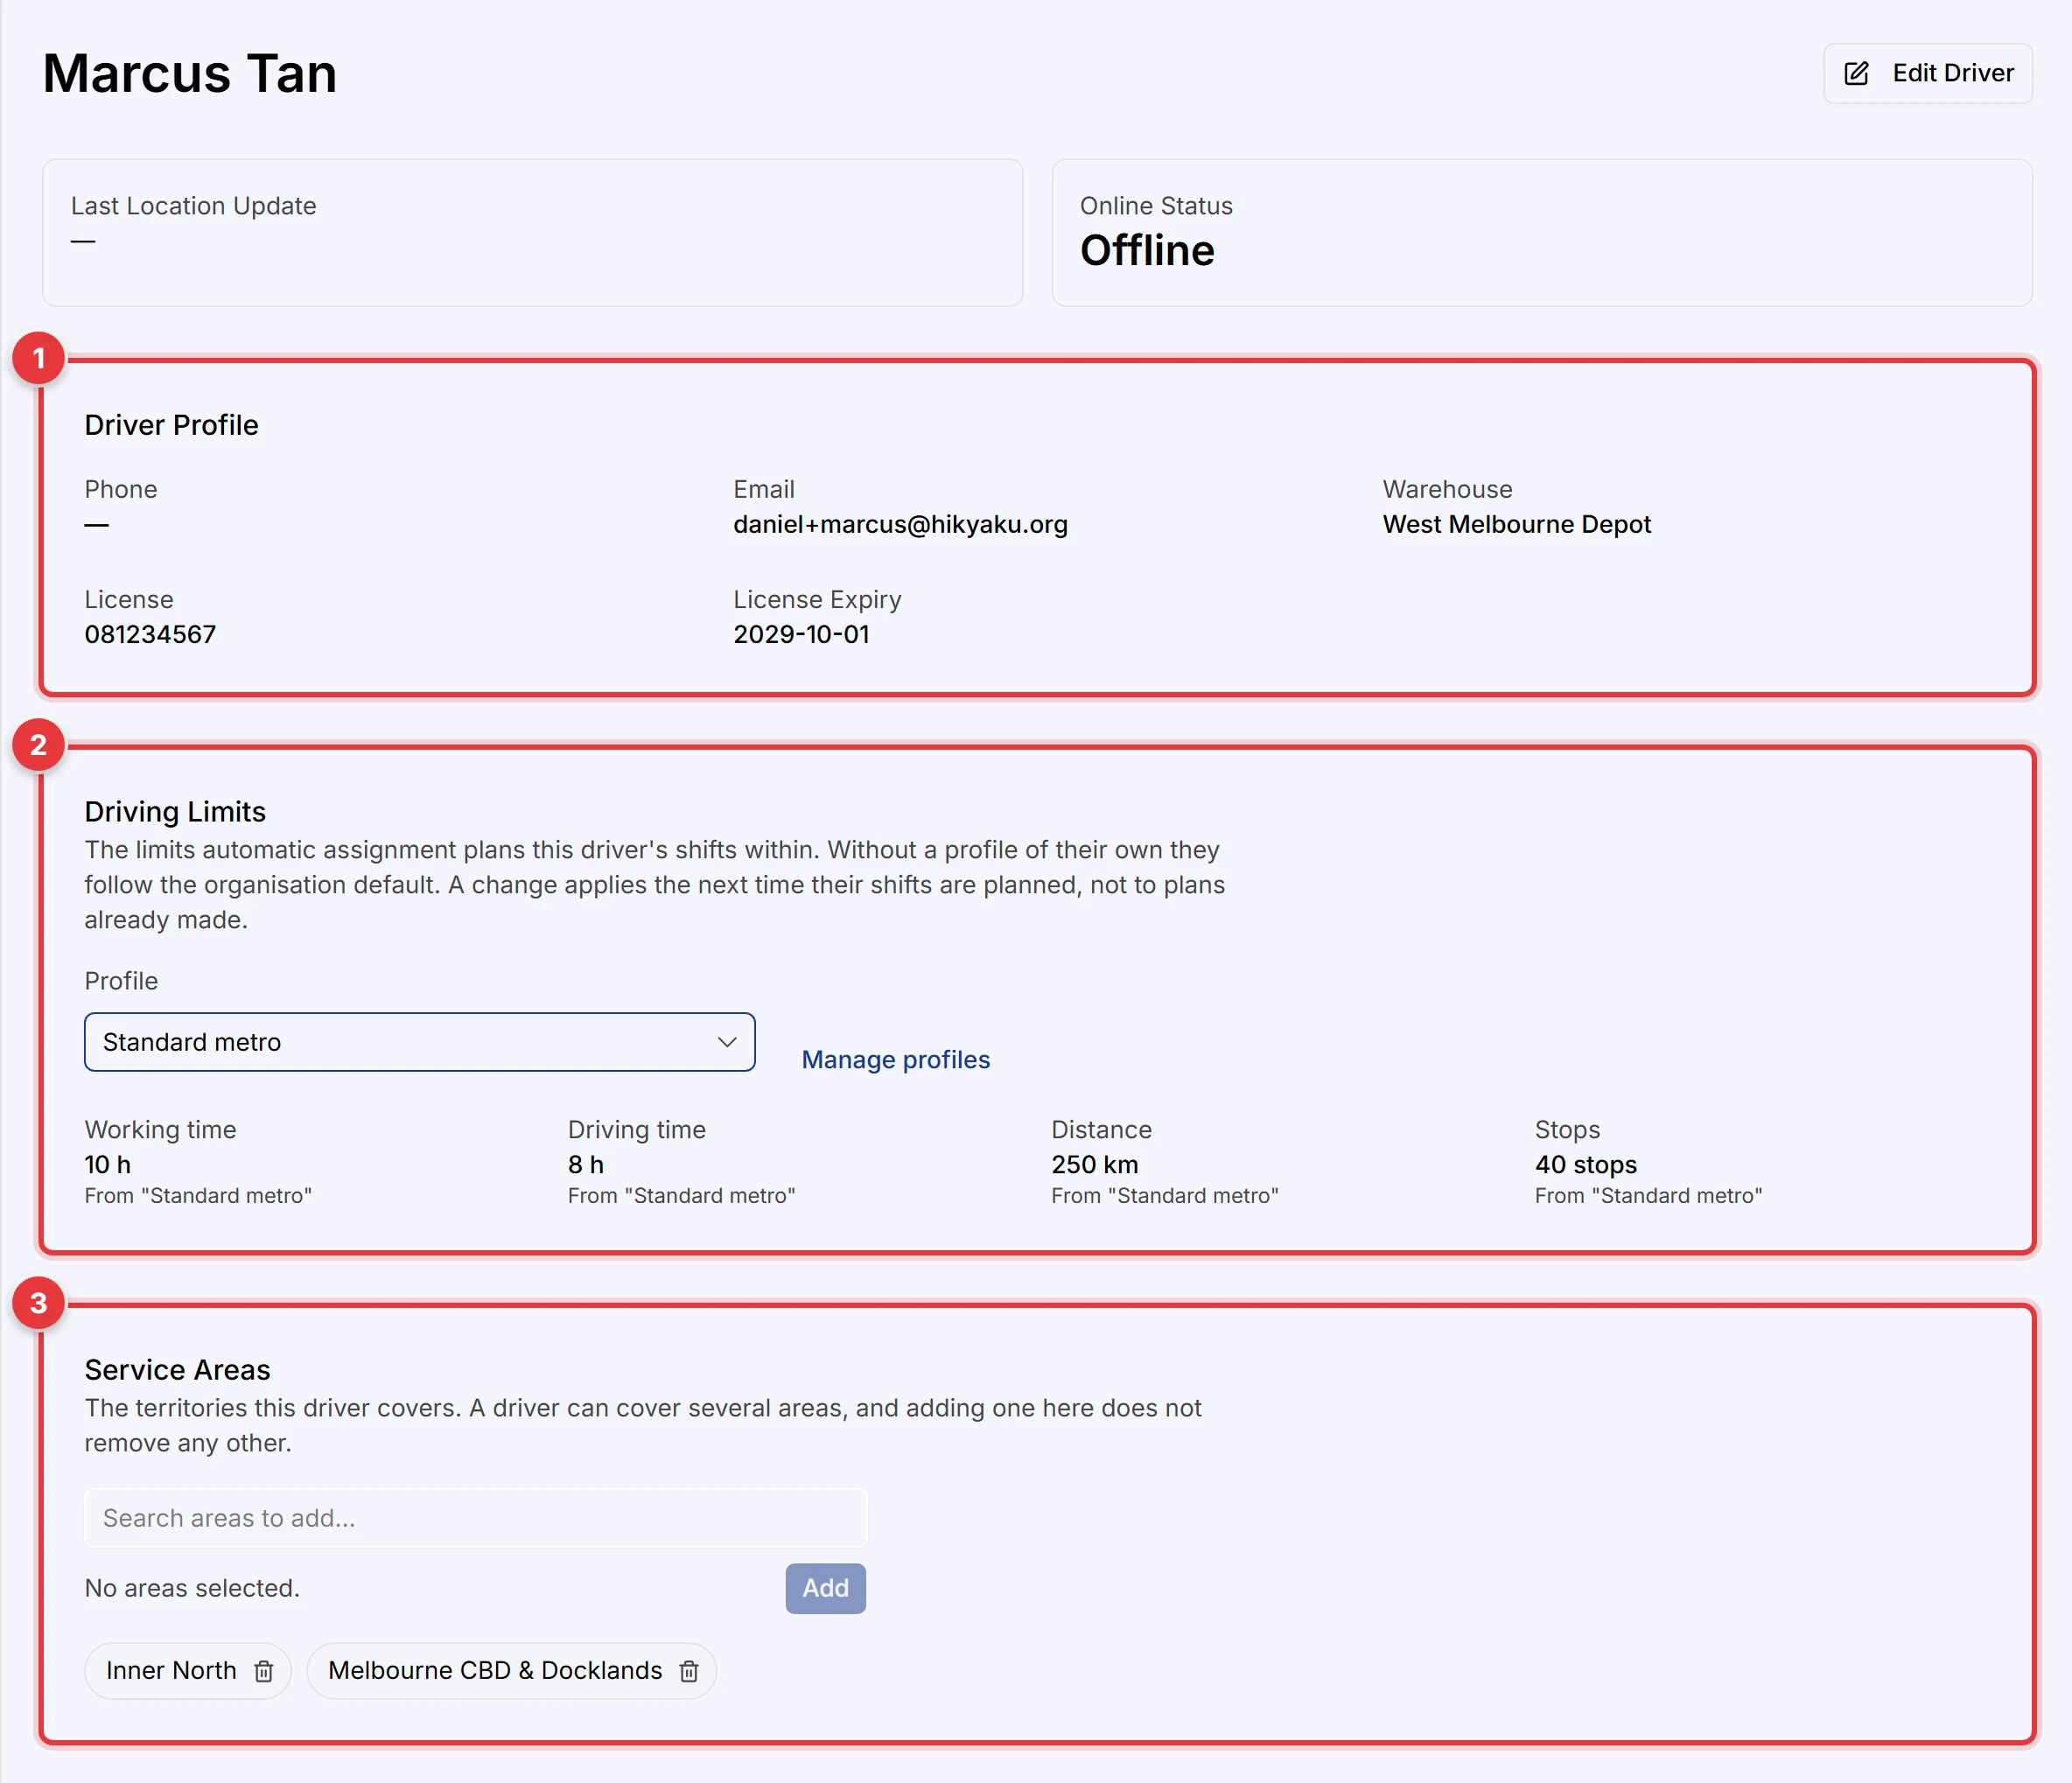
At the top, the driver page shows the Last Location Update and the Online Status of the driver.
- Driver Profile: the phone number, email, warehouse, licence number and licence expiry. Click Edit Driver to change them.
- Driving Limits: the limit profile of the driver, and the four limits that apply. Refer to Driving Limits.
- Service Areas: the territories that the driver covers.
Below these cards, the driver page shows:
- Current Location: the live position of the driver on a map, when the driver shares their location from the app.
- Assigned Shifts: a weekly calendar of the driver's shifts. Click a shift to open it.
- Packages (Assigned / Delivered): the packages of the driver and their status.
- Location History: the path of the driver between two dates. Select From and To, then click Load History.
Service areas
- In the Service Areas card, type the name of an area in the search field.
- Select the area, then click Add.
- To remove an area, click the delete icon next to it.
A driver can cover many areas. When you add an area, Hikyaku does not remove the other areas.
A driver with no areas is a floater. Hikyaku can give a floater work anywhere at the warehouse. When you add the first area, the driver is no longer a floater. For more information, refer to Service Areas.
Deactivate a team member
Deactivation stops the sign-in of the person and ends their sessions. Hikyaku keeps their history. For the rules, refer to Change or remove access.