Driver Shifts
A shift is one driver, one vehicle and one route on one day. The route starts at the warehouse, goes to each stop, and comes back to the warehouse. Hikyaku makes most shifts automatically when packages come in. Refer to Dispatch and Operations.
Who can use this page: team members with shifts.view. To make or change a shift, you must have shifts.assign. Refer to Access Control.
See the shifts of the week
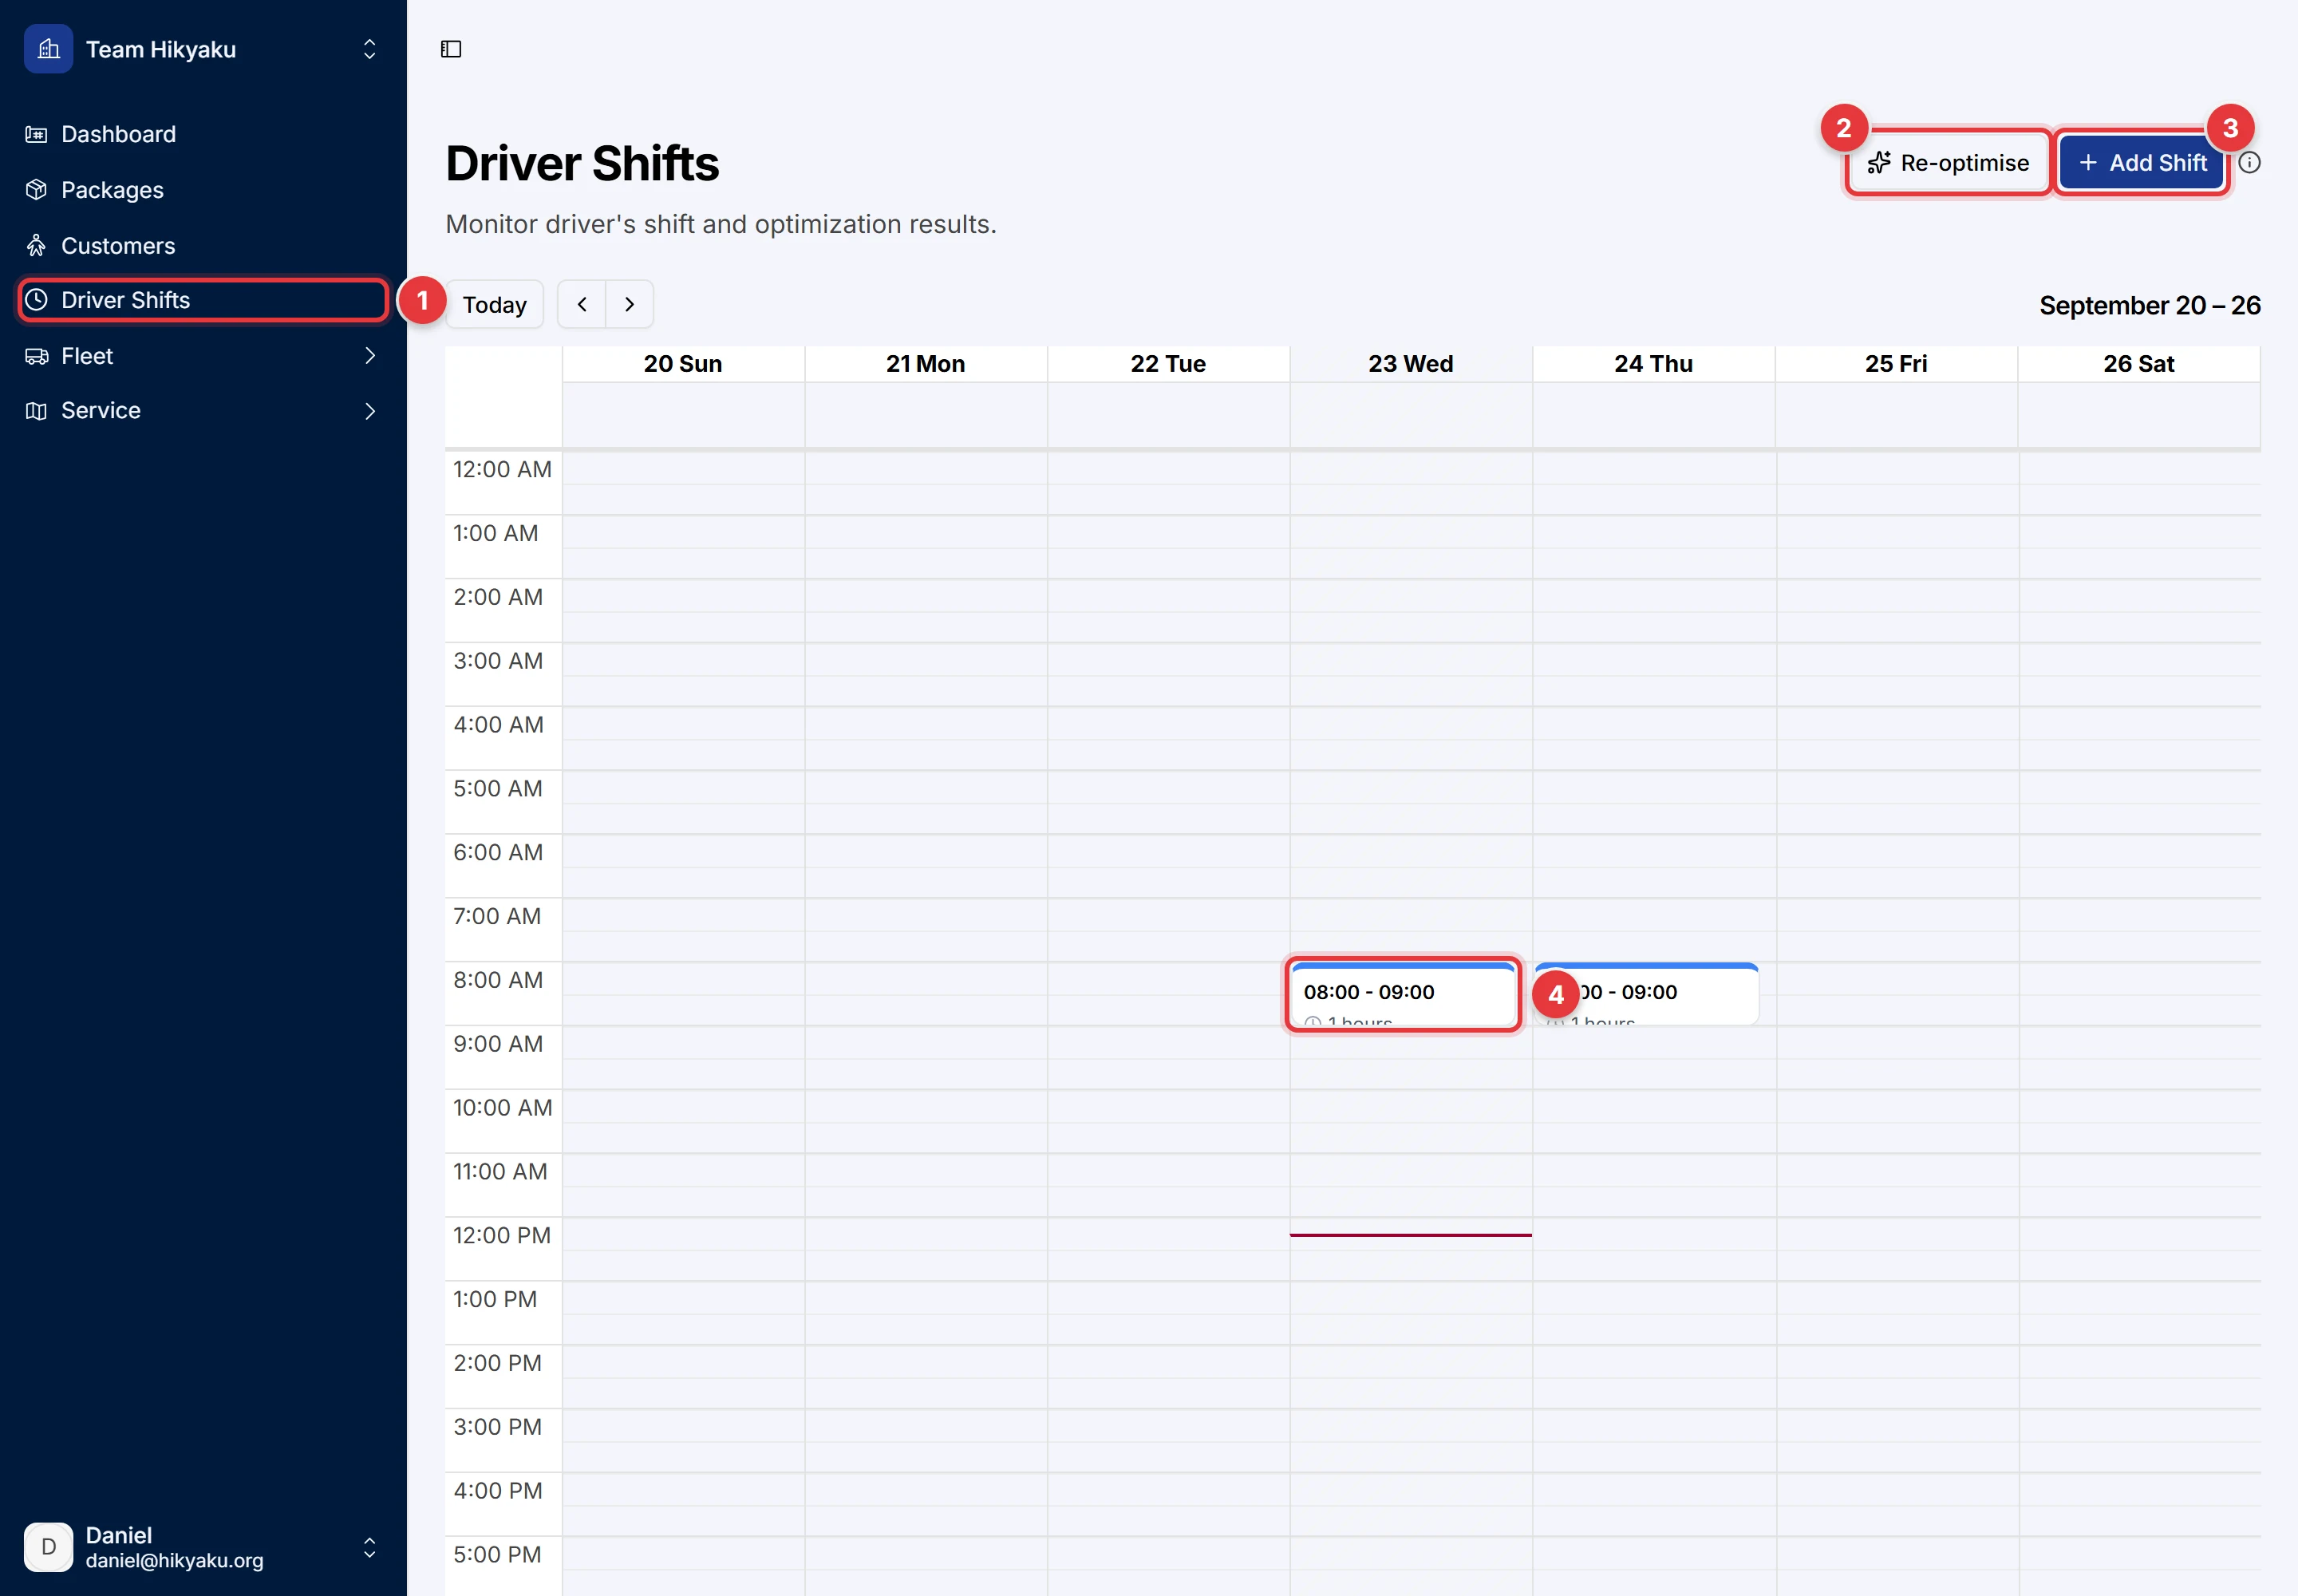
- In the sidebar, click Driver Shifts.
- Click Re-optimise to solve the routes of a warehouse again.
- Click Add Shift to make a shift manually.
- Click a shift on the calendar to open it.
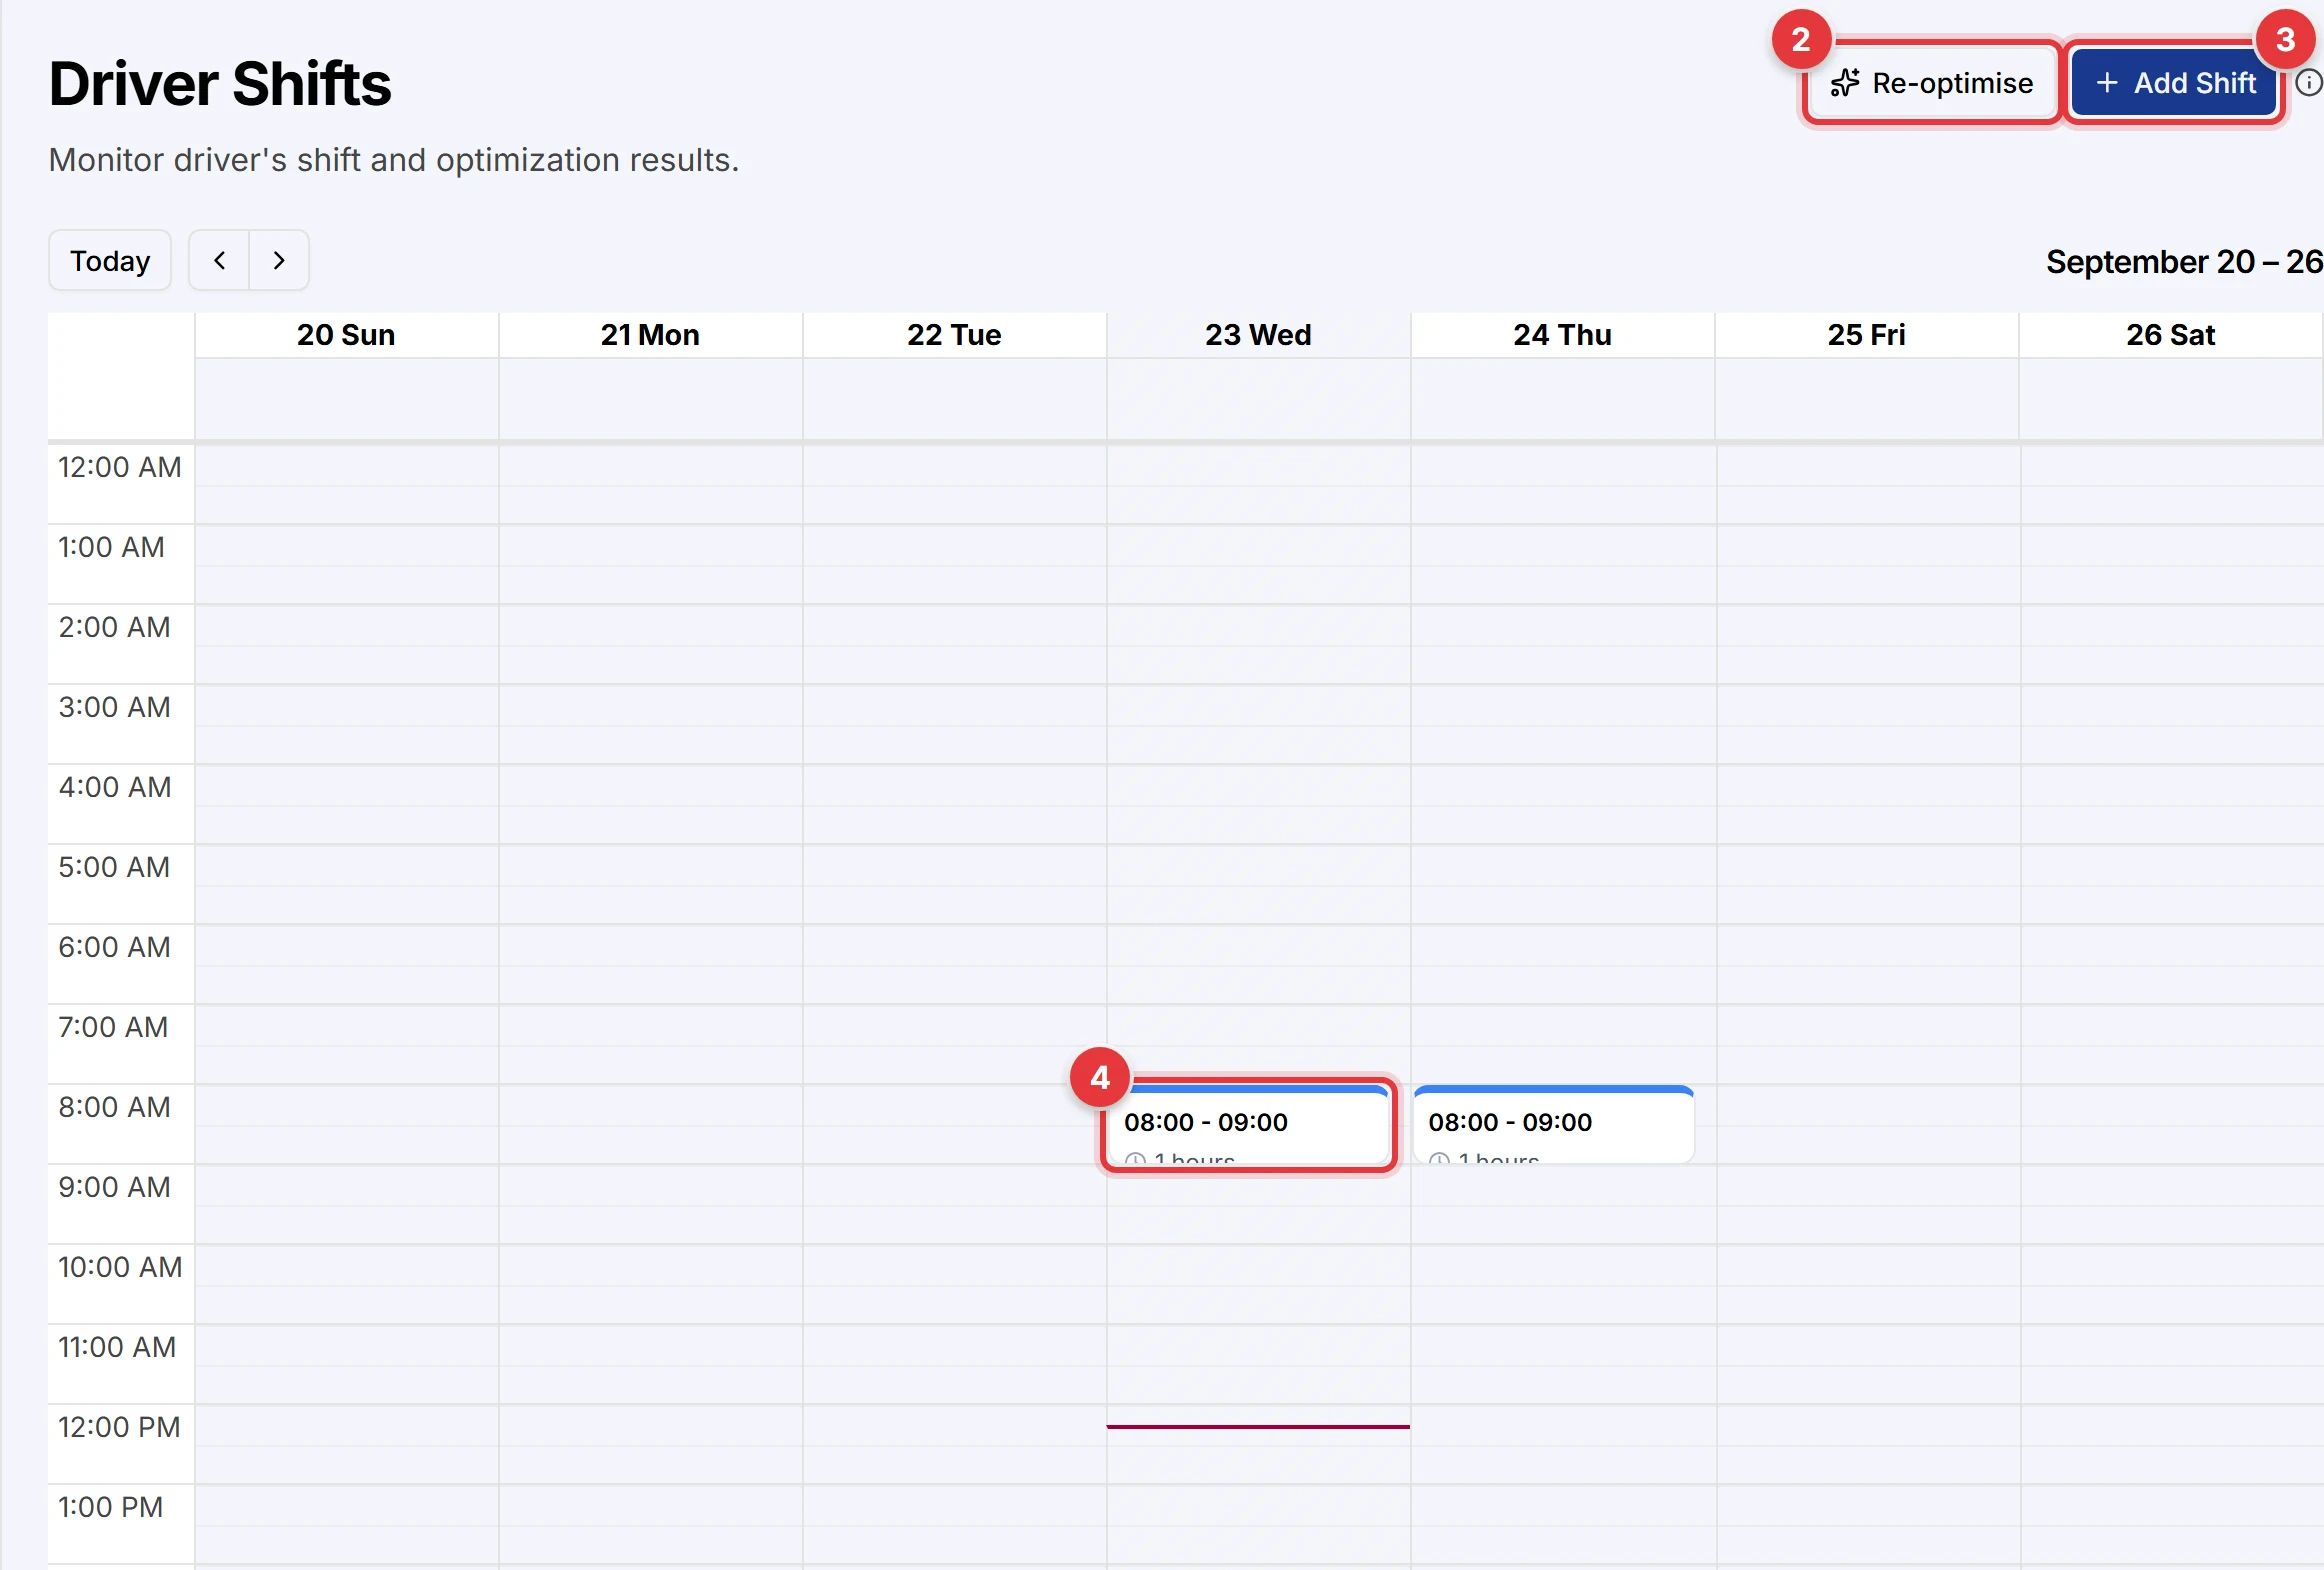
The calendar shows one week. Use Today and the arrow buttons to move between weeks. The red line shows the time now.
A shift that is near or over a driving limit of its driver has a mark on the calendar. Put the pointer on the shift to see which limit.
Open a shift
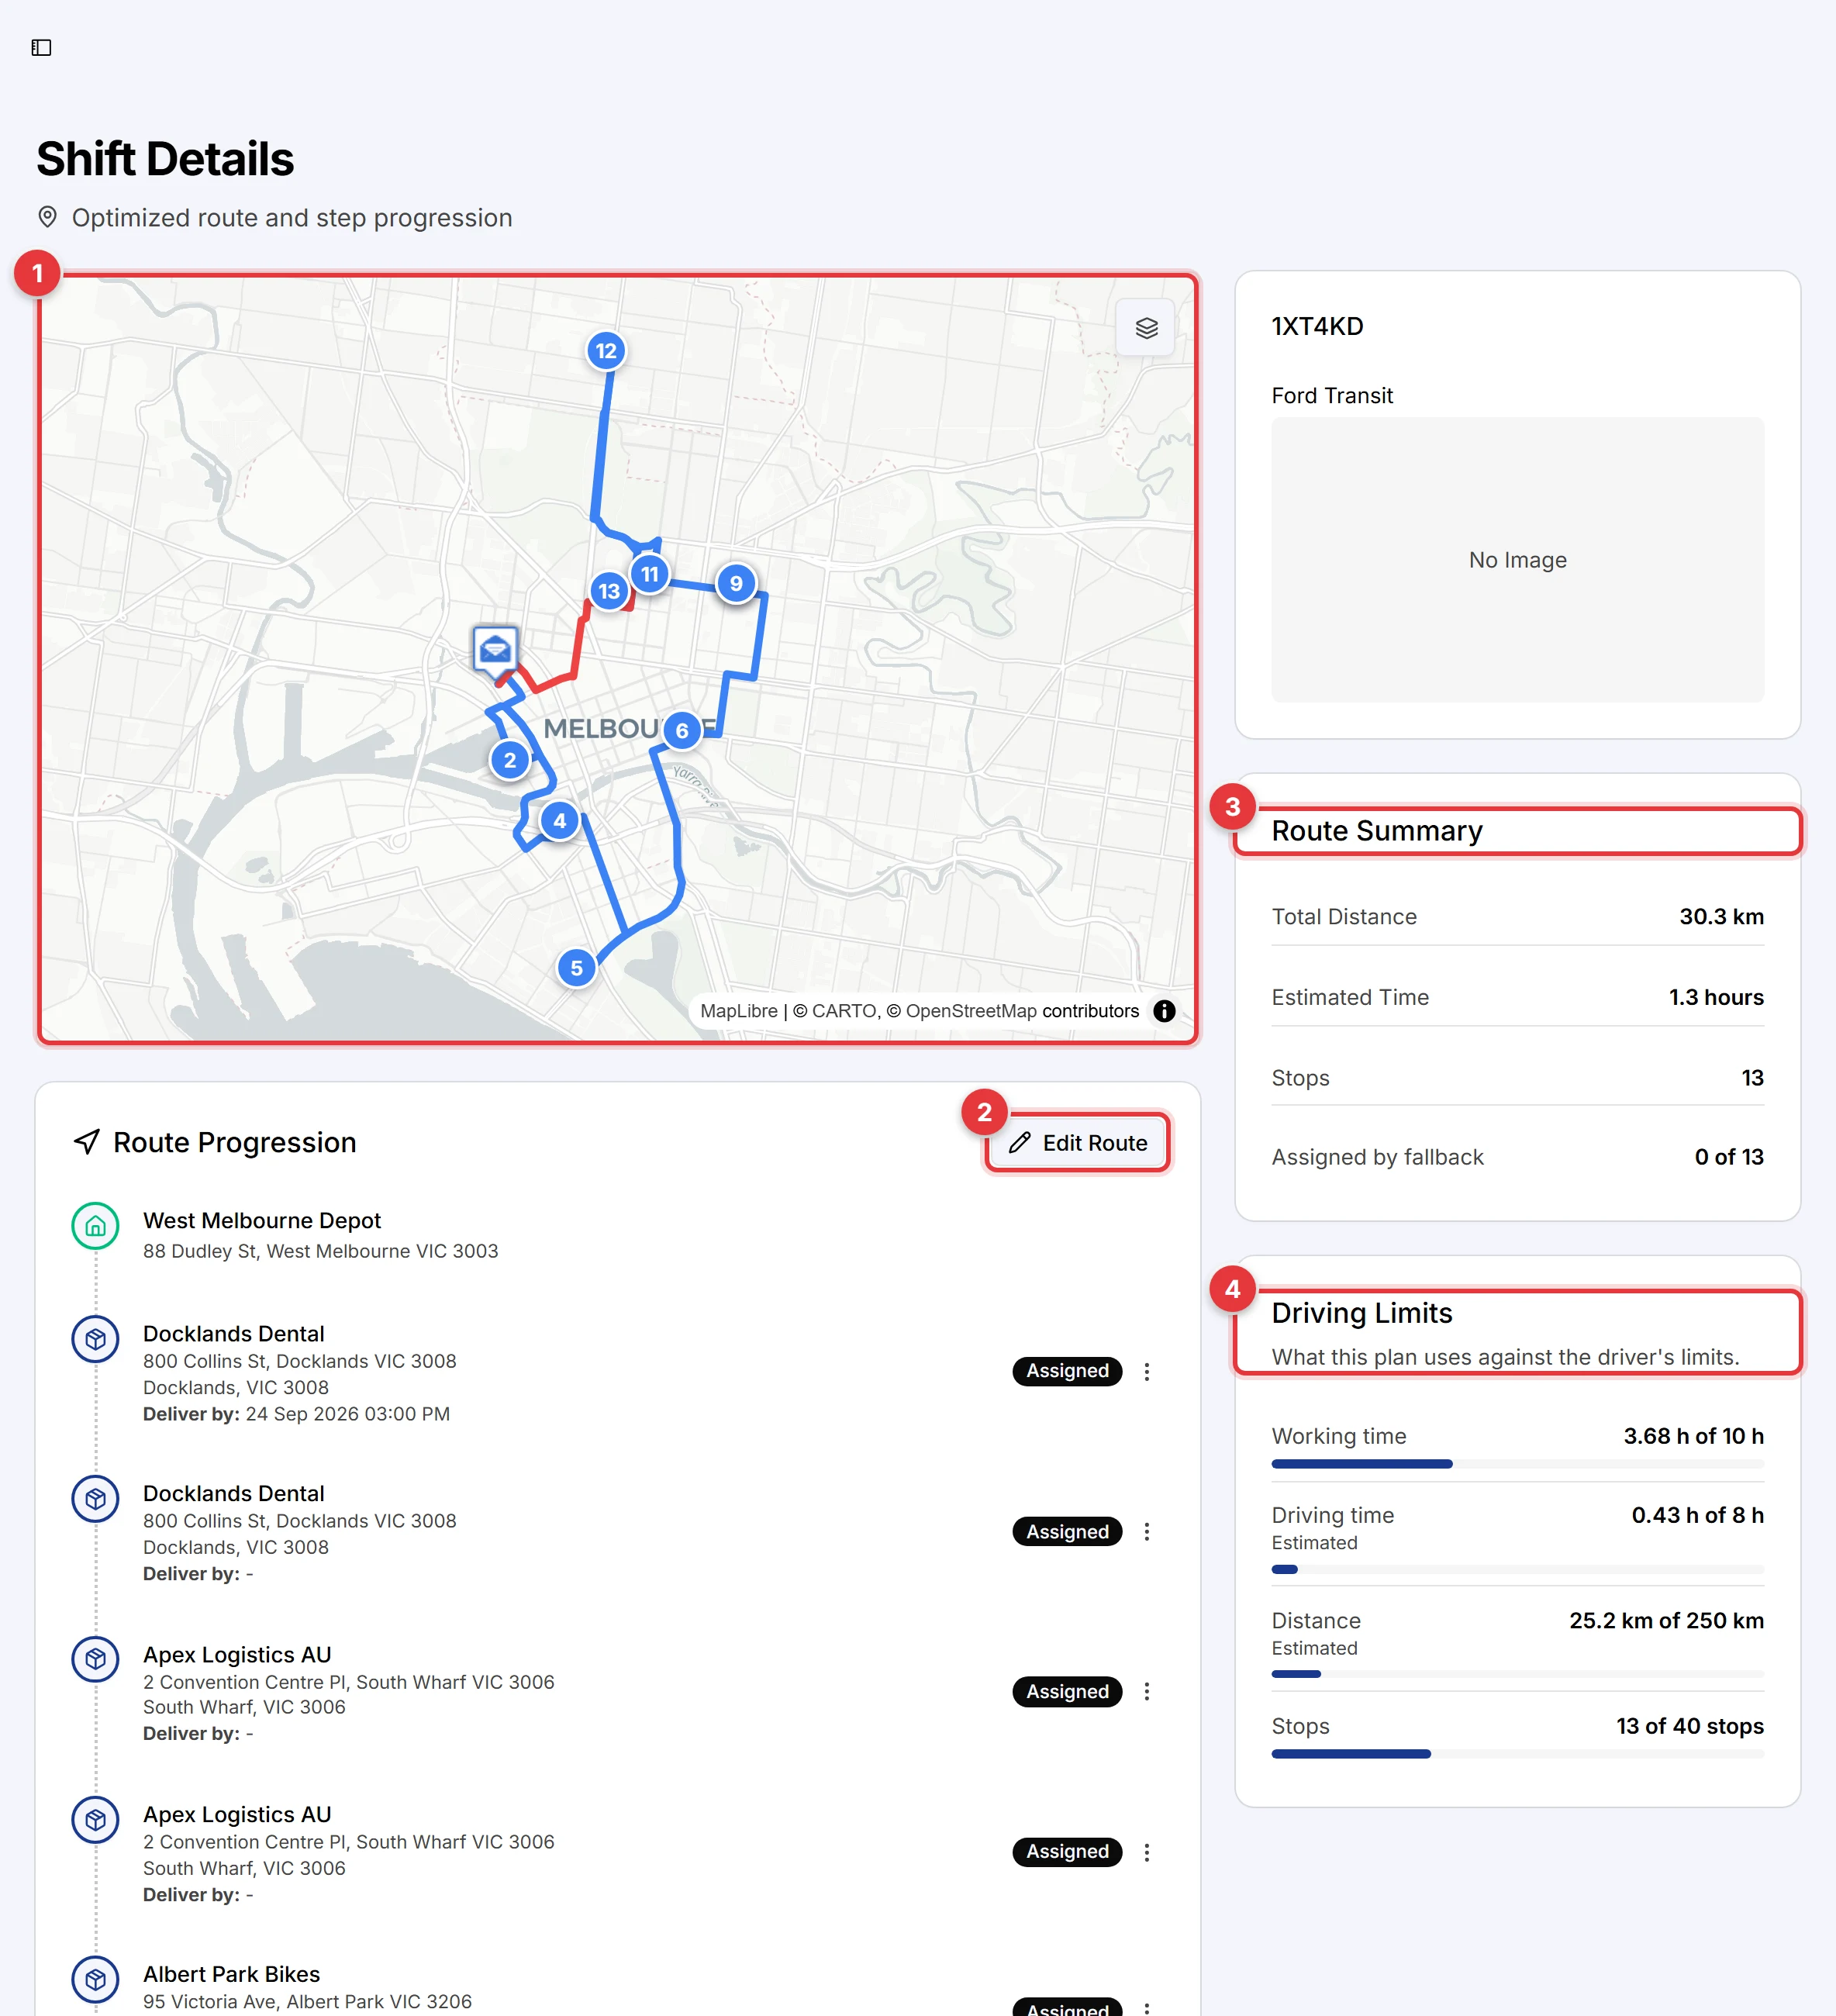
- Route map: the outbound route, the return trip and a numbered marker for each stop. When the driver shares their location, the map also shows the driver.
- Route Progression: each stop in sequence, with the receiver, the address, the deadline and the status. Click Edit Route to change the stops.
- Route Summary: the total distance, the estimated time and the number of stops. Assigned by fallback shows the stops that a coverage fallback assigned.
- Driving Limits: the planned working time, driving time, distance and stops against the limits of the driver.
The vehicle card at the top right shows the plate, the make and the model.
Driving limits on the shift
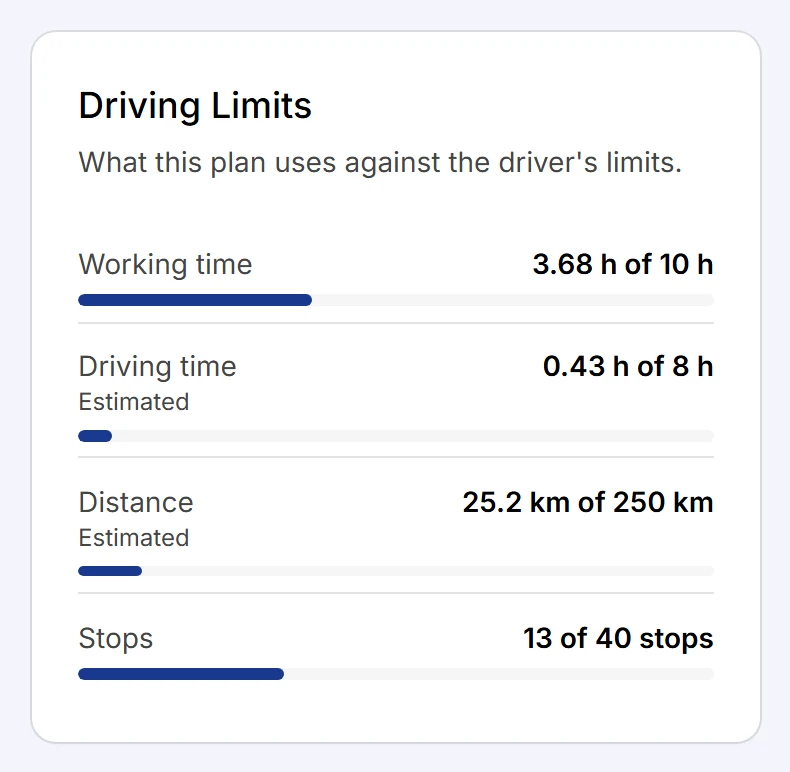
Each row compares the plan with the limit, for example "3.68 h of 10 h". A row that is near the limit shows Near limit. A row that is above the limit shows Over limit. For more information, refer to Driving Limits.
Change the stops of a shift
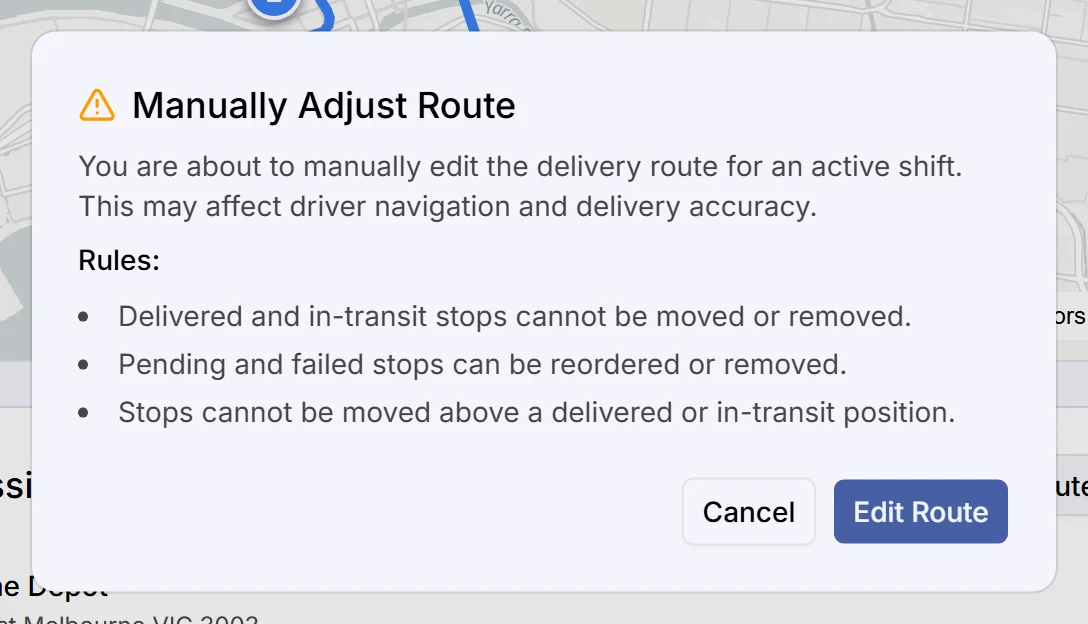
- On the shift page, click Edit Route.
- Read the rules, then click Edit Route in the dialog.
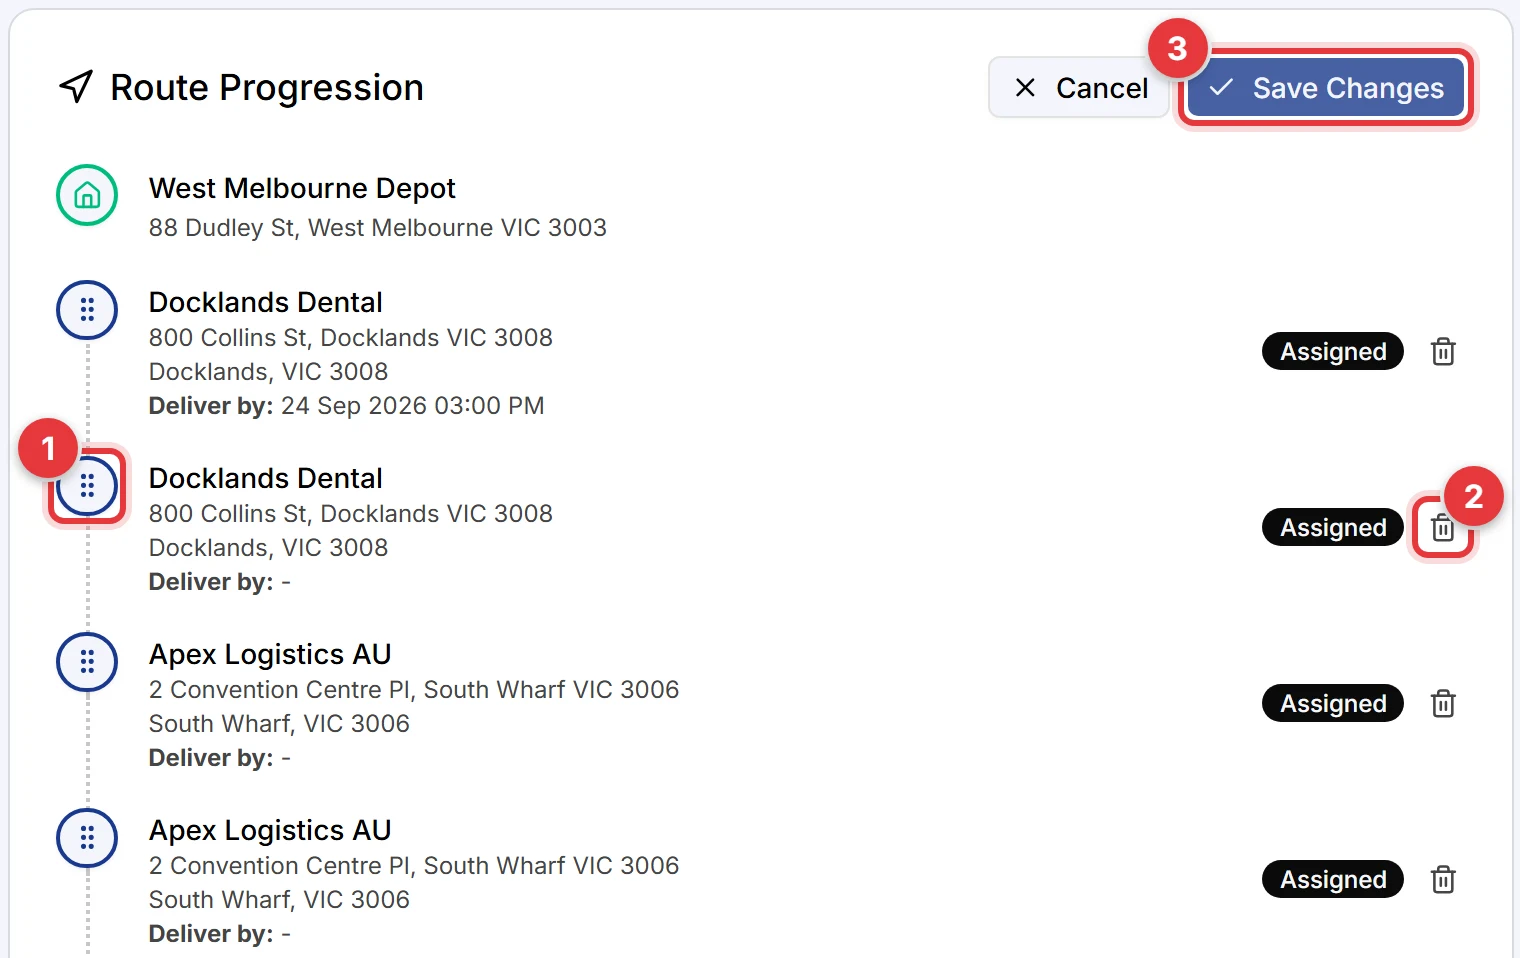
- Drag a stop by its handle to move it up or down.
- Click the remove icon to take a stop off the route. The package goes back to Pending.
- Click Save Changes. To stop without changes, click Cancel.
- You cannot move or remove a stop that is Delivered or In Transit.
- You cannot move a stop above a delivered or in-transit stop.
- You can move or remove stops that are Assigned, Pending or Failed.
A manual change affects the navigation of the driver immediately. Tell the driver about large changes.
Make a shift manually
Use a manual shift when you want to choose the driver, the van and the packages yourself. A manual shift has five steps.
Step 1: Warehouse
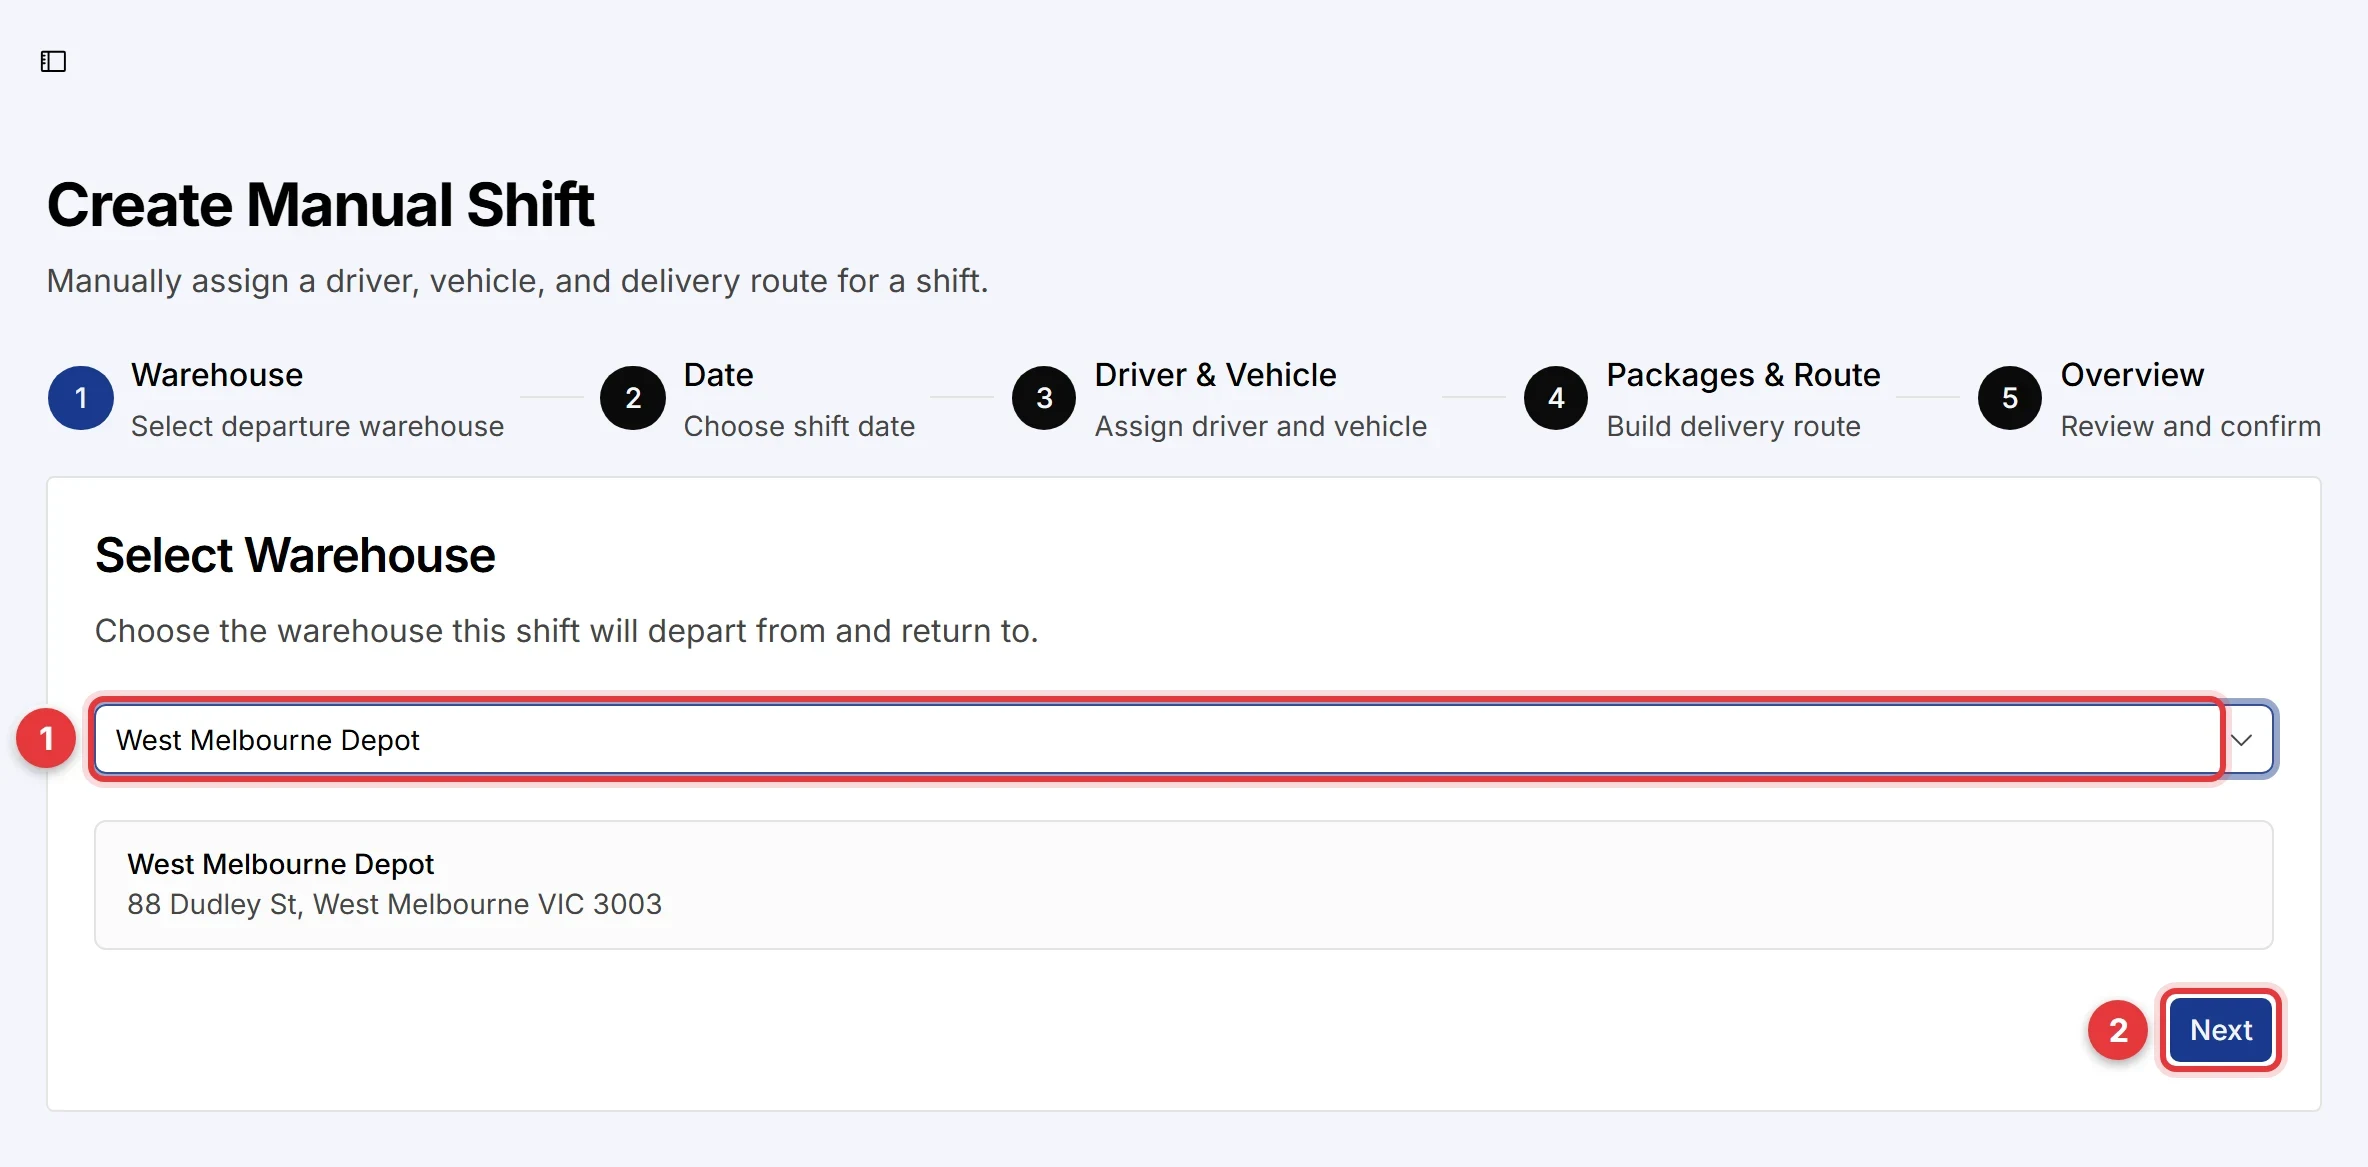
- Type the name of the warehouse and select it. The shift starts and ends at this warehouse.
- Click Next.
Step 2: Date
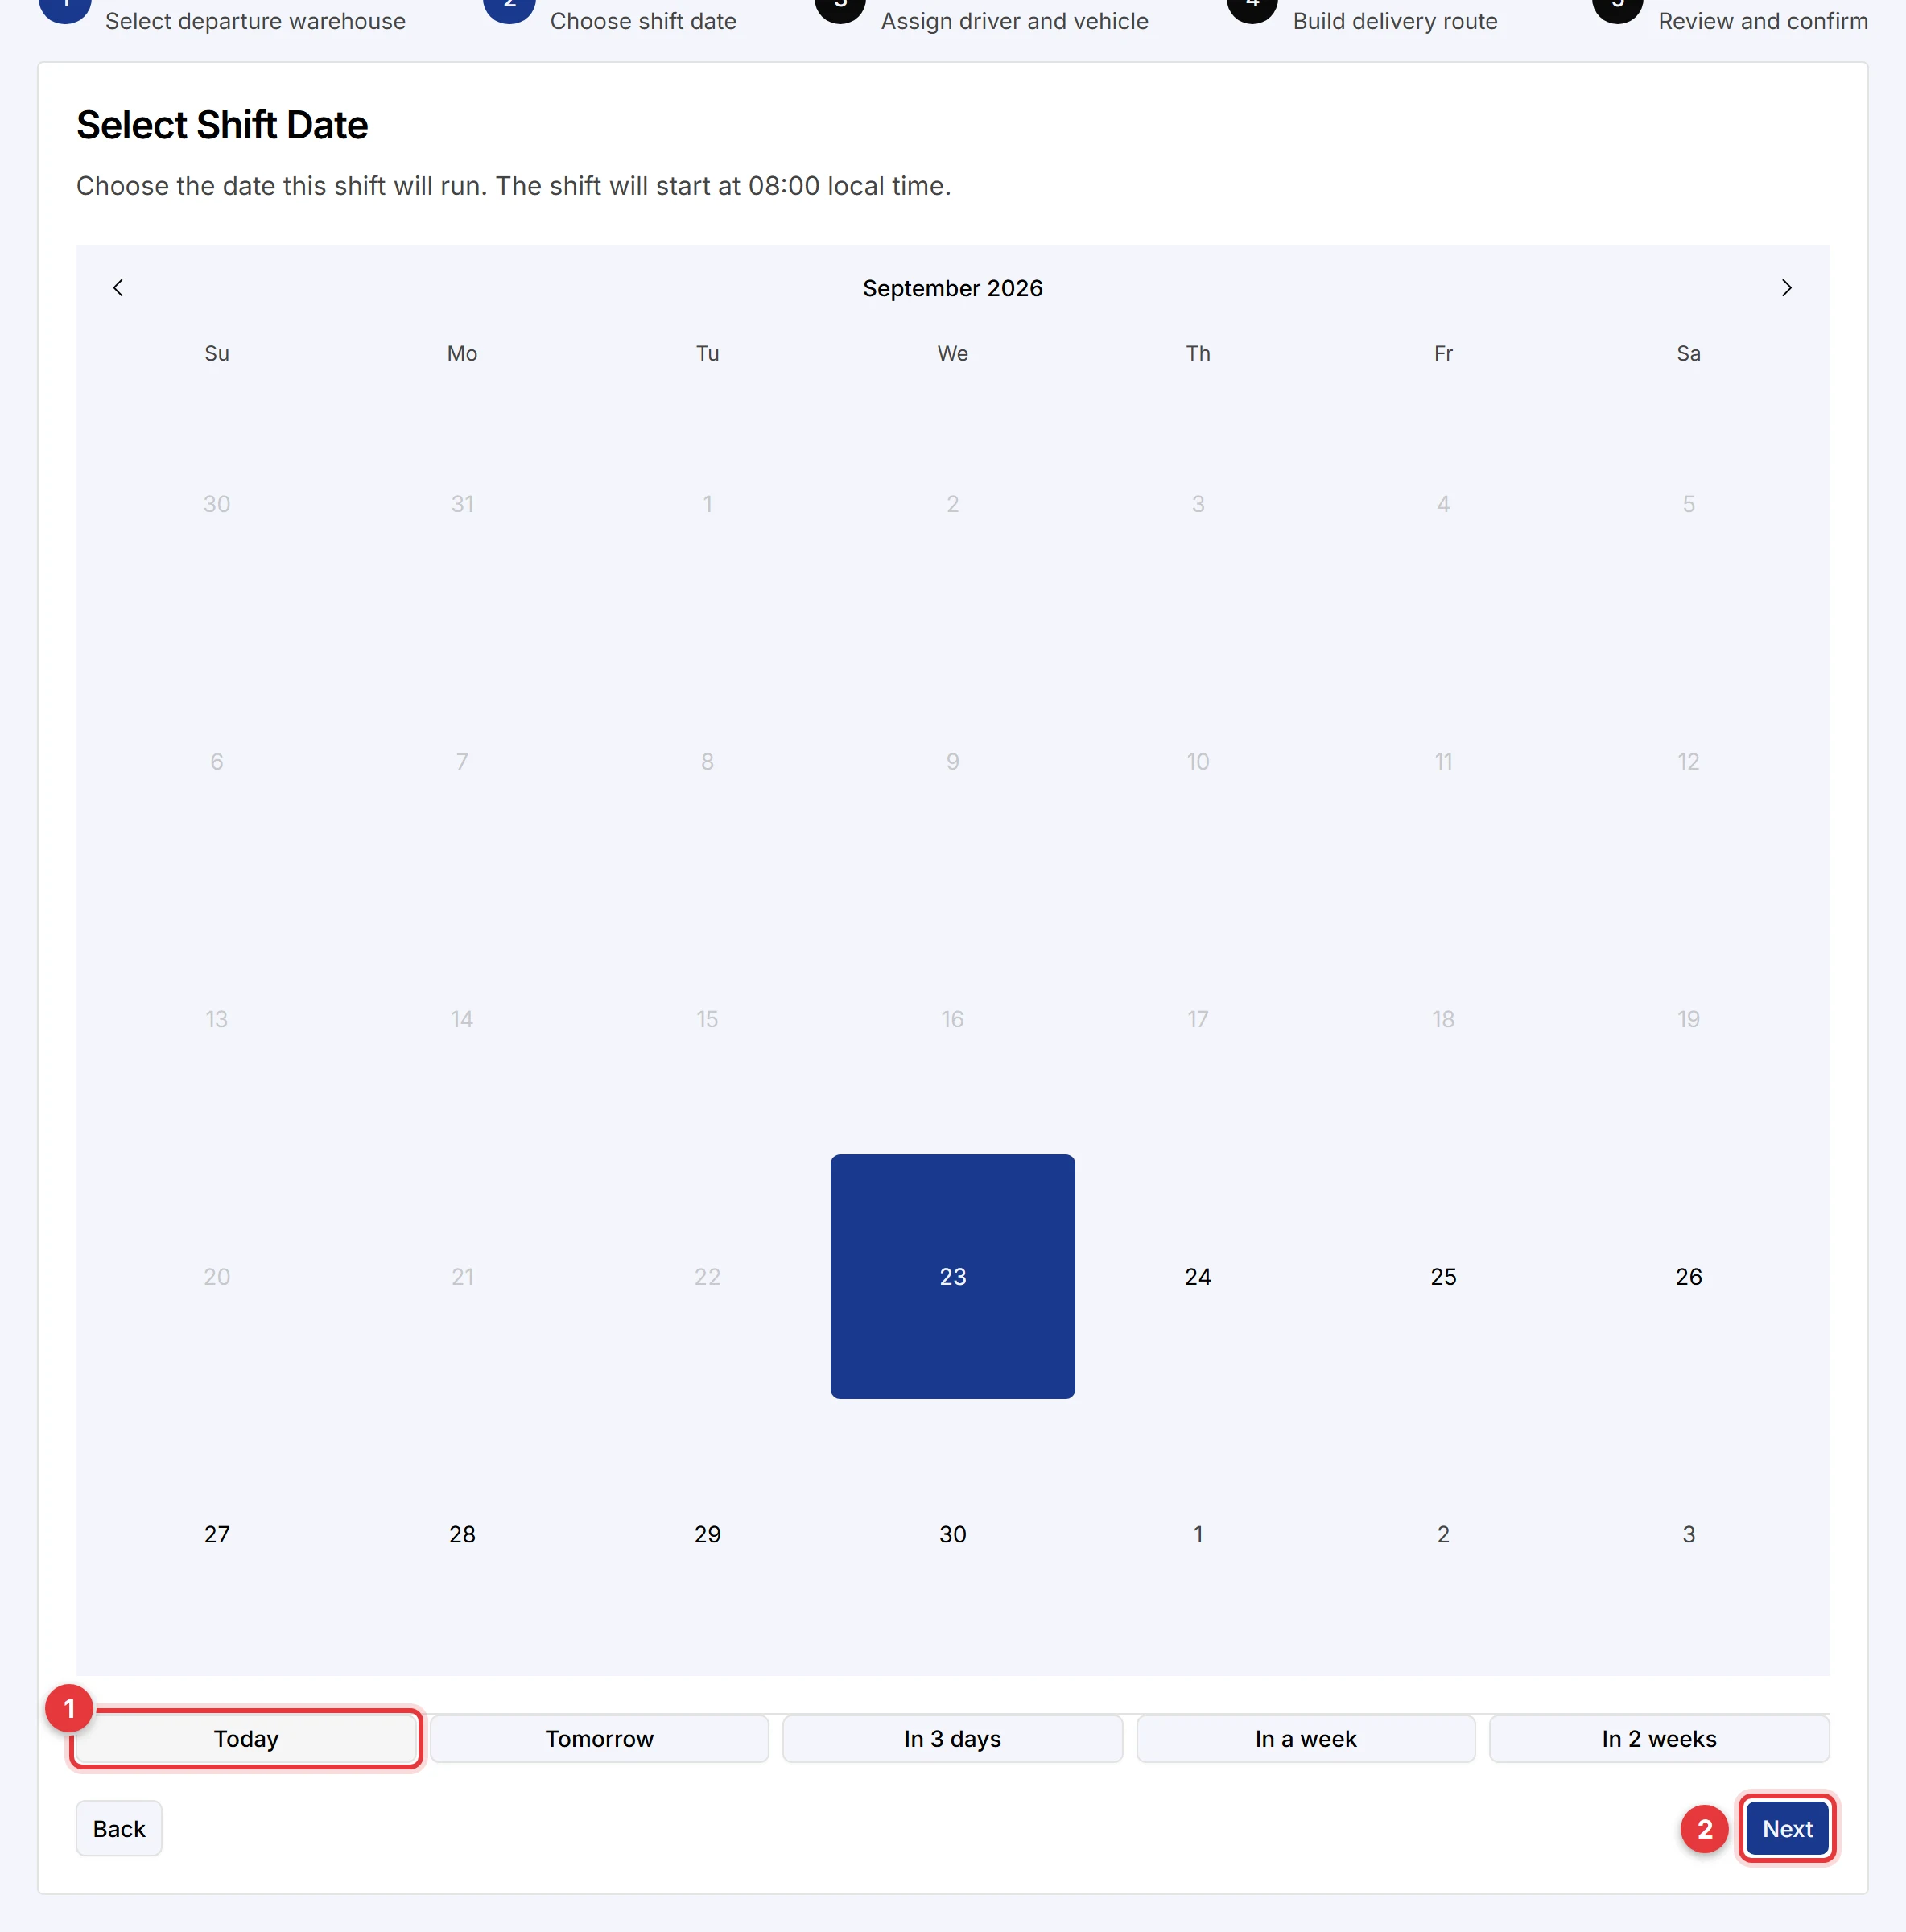
- Select the date on the calendar, or click a quick option such as Today or Tomorrow.
- Click Next.
Step 3: Driver and vehicle
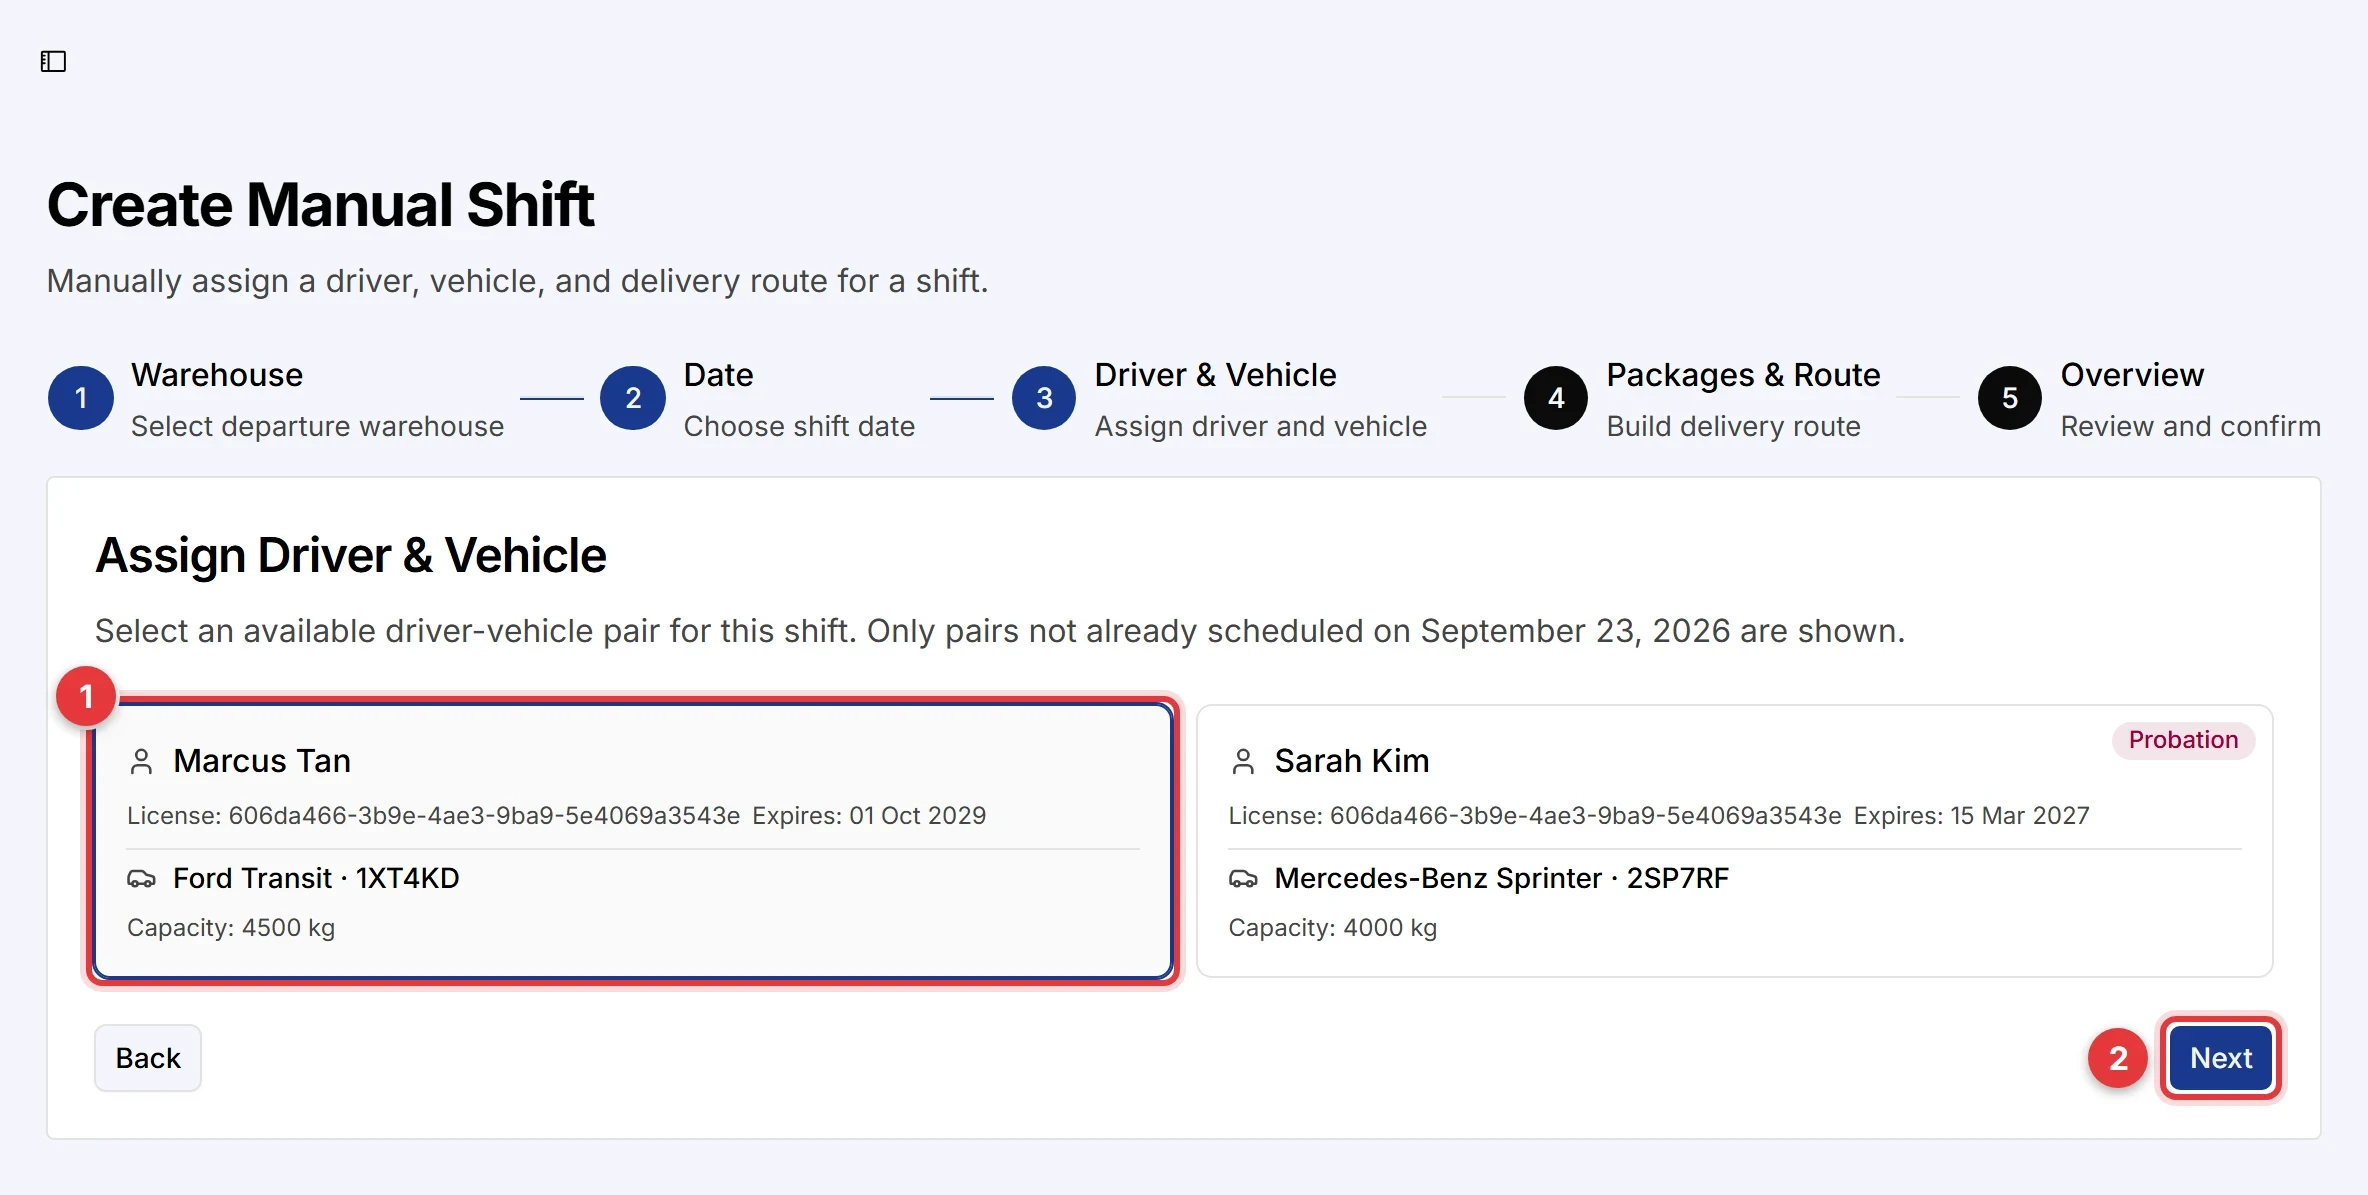
- Select a driver and vehicle pair. The list shows only pairs that do not have a shift on this date. Each card shows the licence expiry and the vehicle capacity. A Probation badge shows a driver on probation.
- Click Next.
If a driver's licence expired before the shift date, the card shows a warning.
Step 4: Packages and route
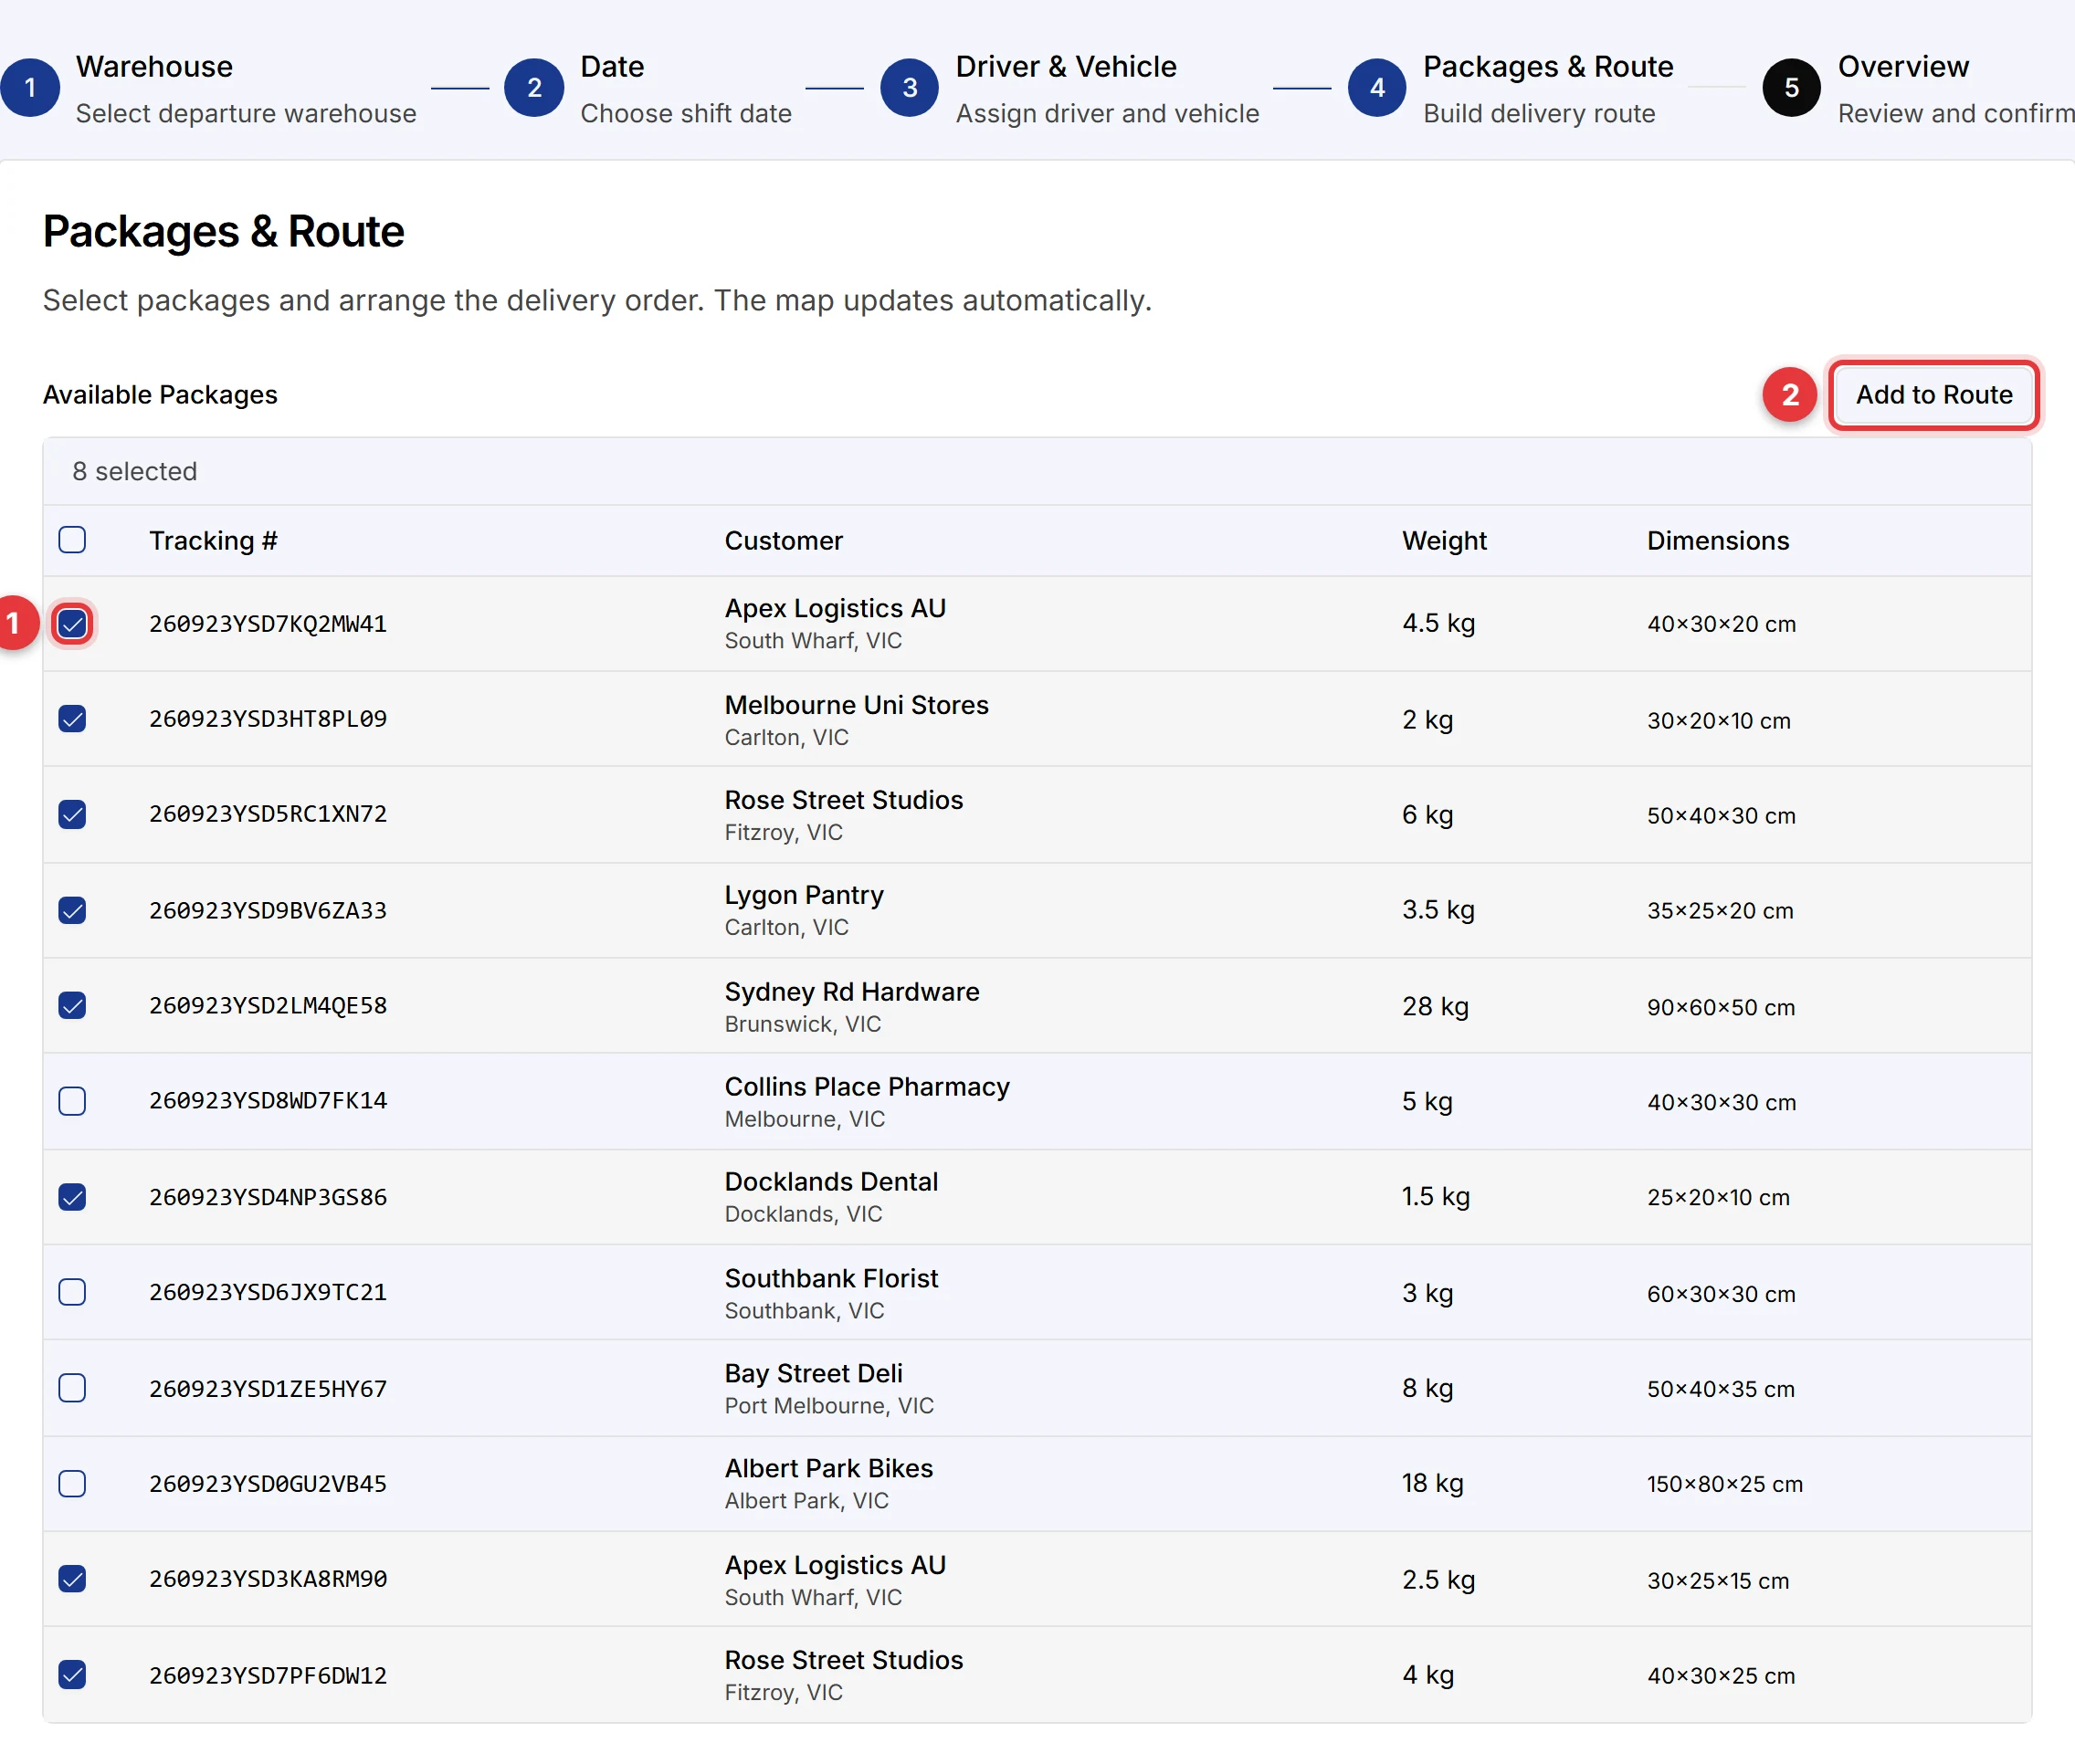
- In Available Packages, select the packages for this shift.
- Click Add to Route.
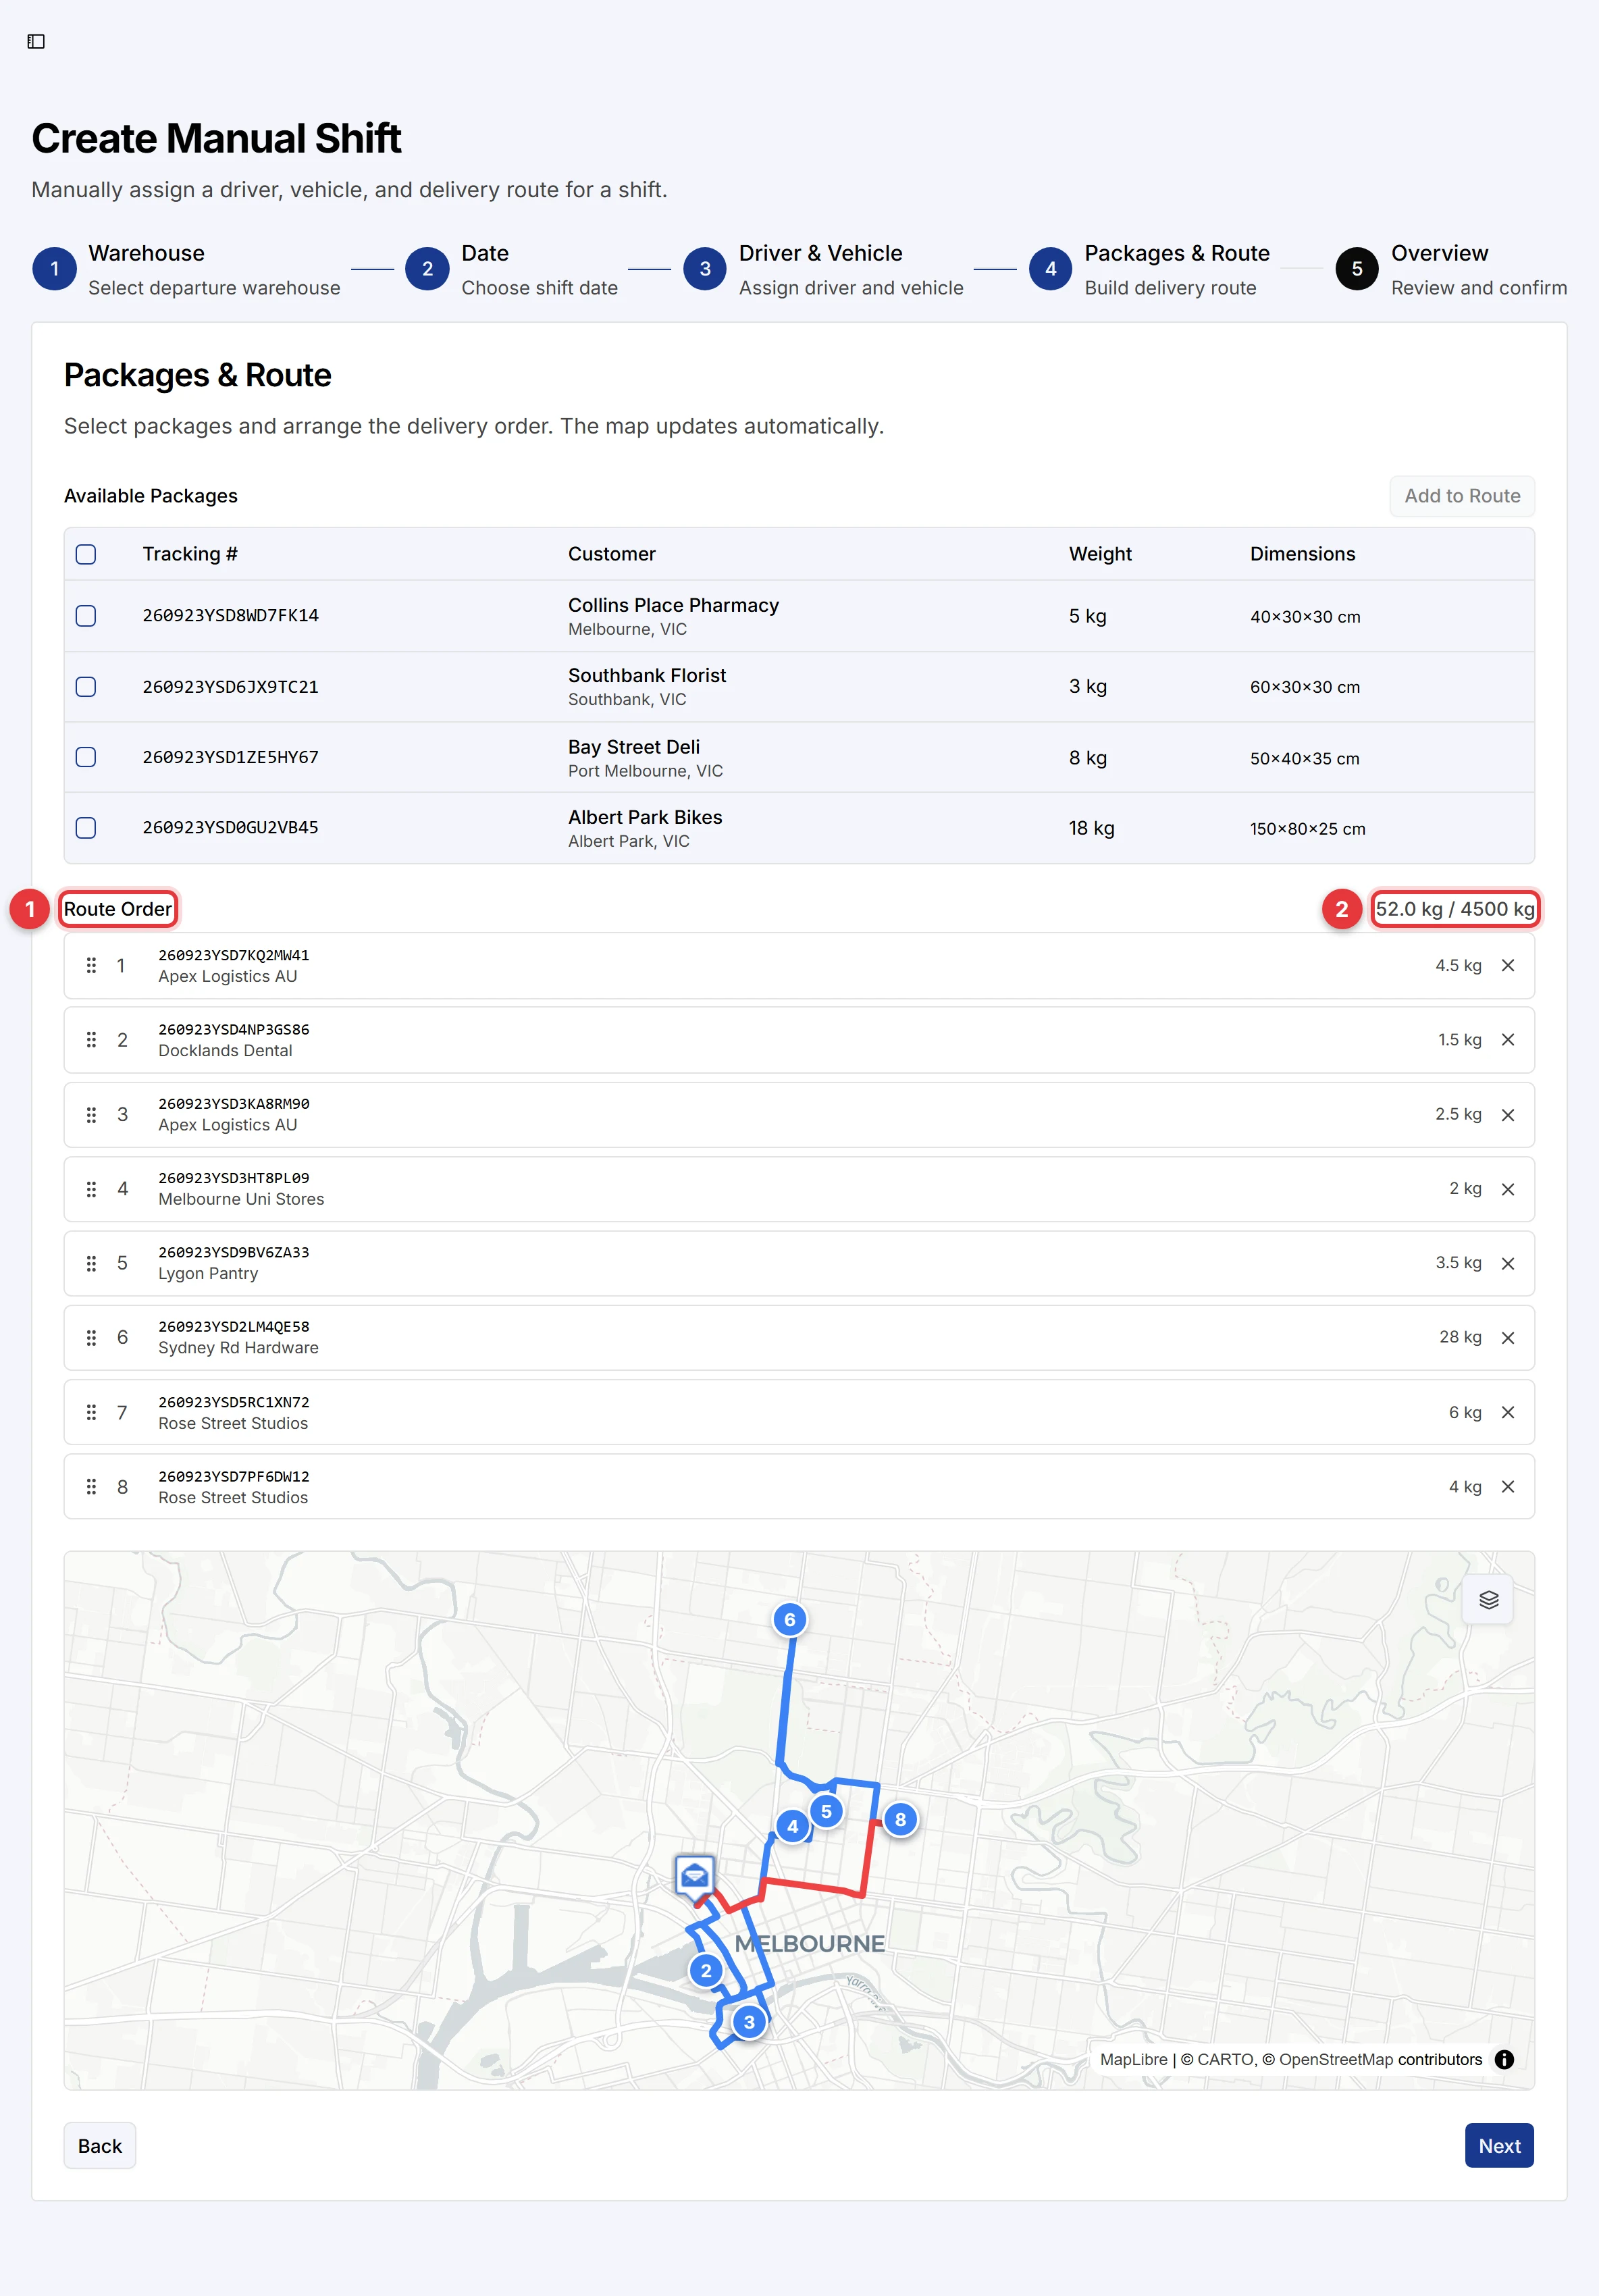
- In Route Order, drag the packages into the sequence that you want. The map shows the route.
- Make sure that the total weight is less than the capacity of the vehicle. If the load is too heavy, the text shows Over capacity!.
- Click Next.
You can also continue with no packages. The shift then stays open, and Hikyaku can add packages to it automatically.
Step 5: Review and create
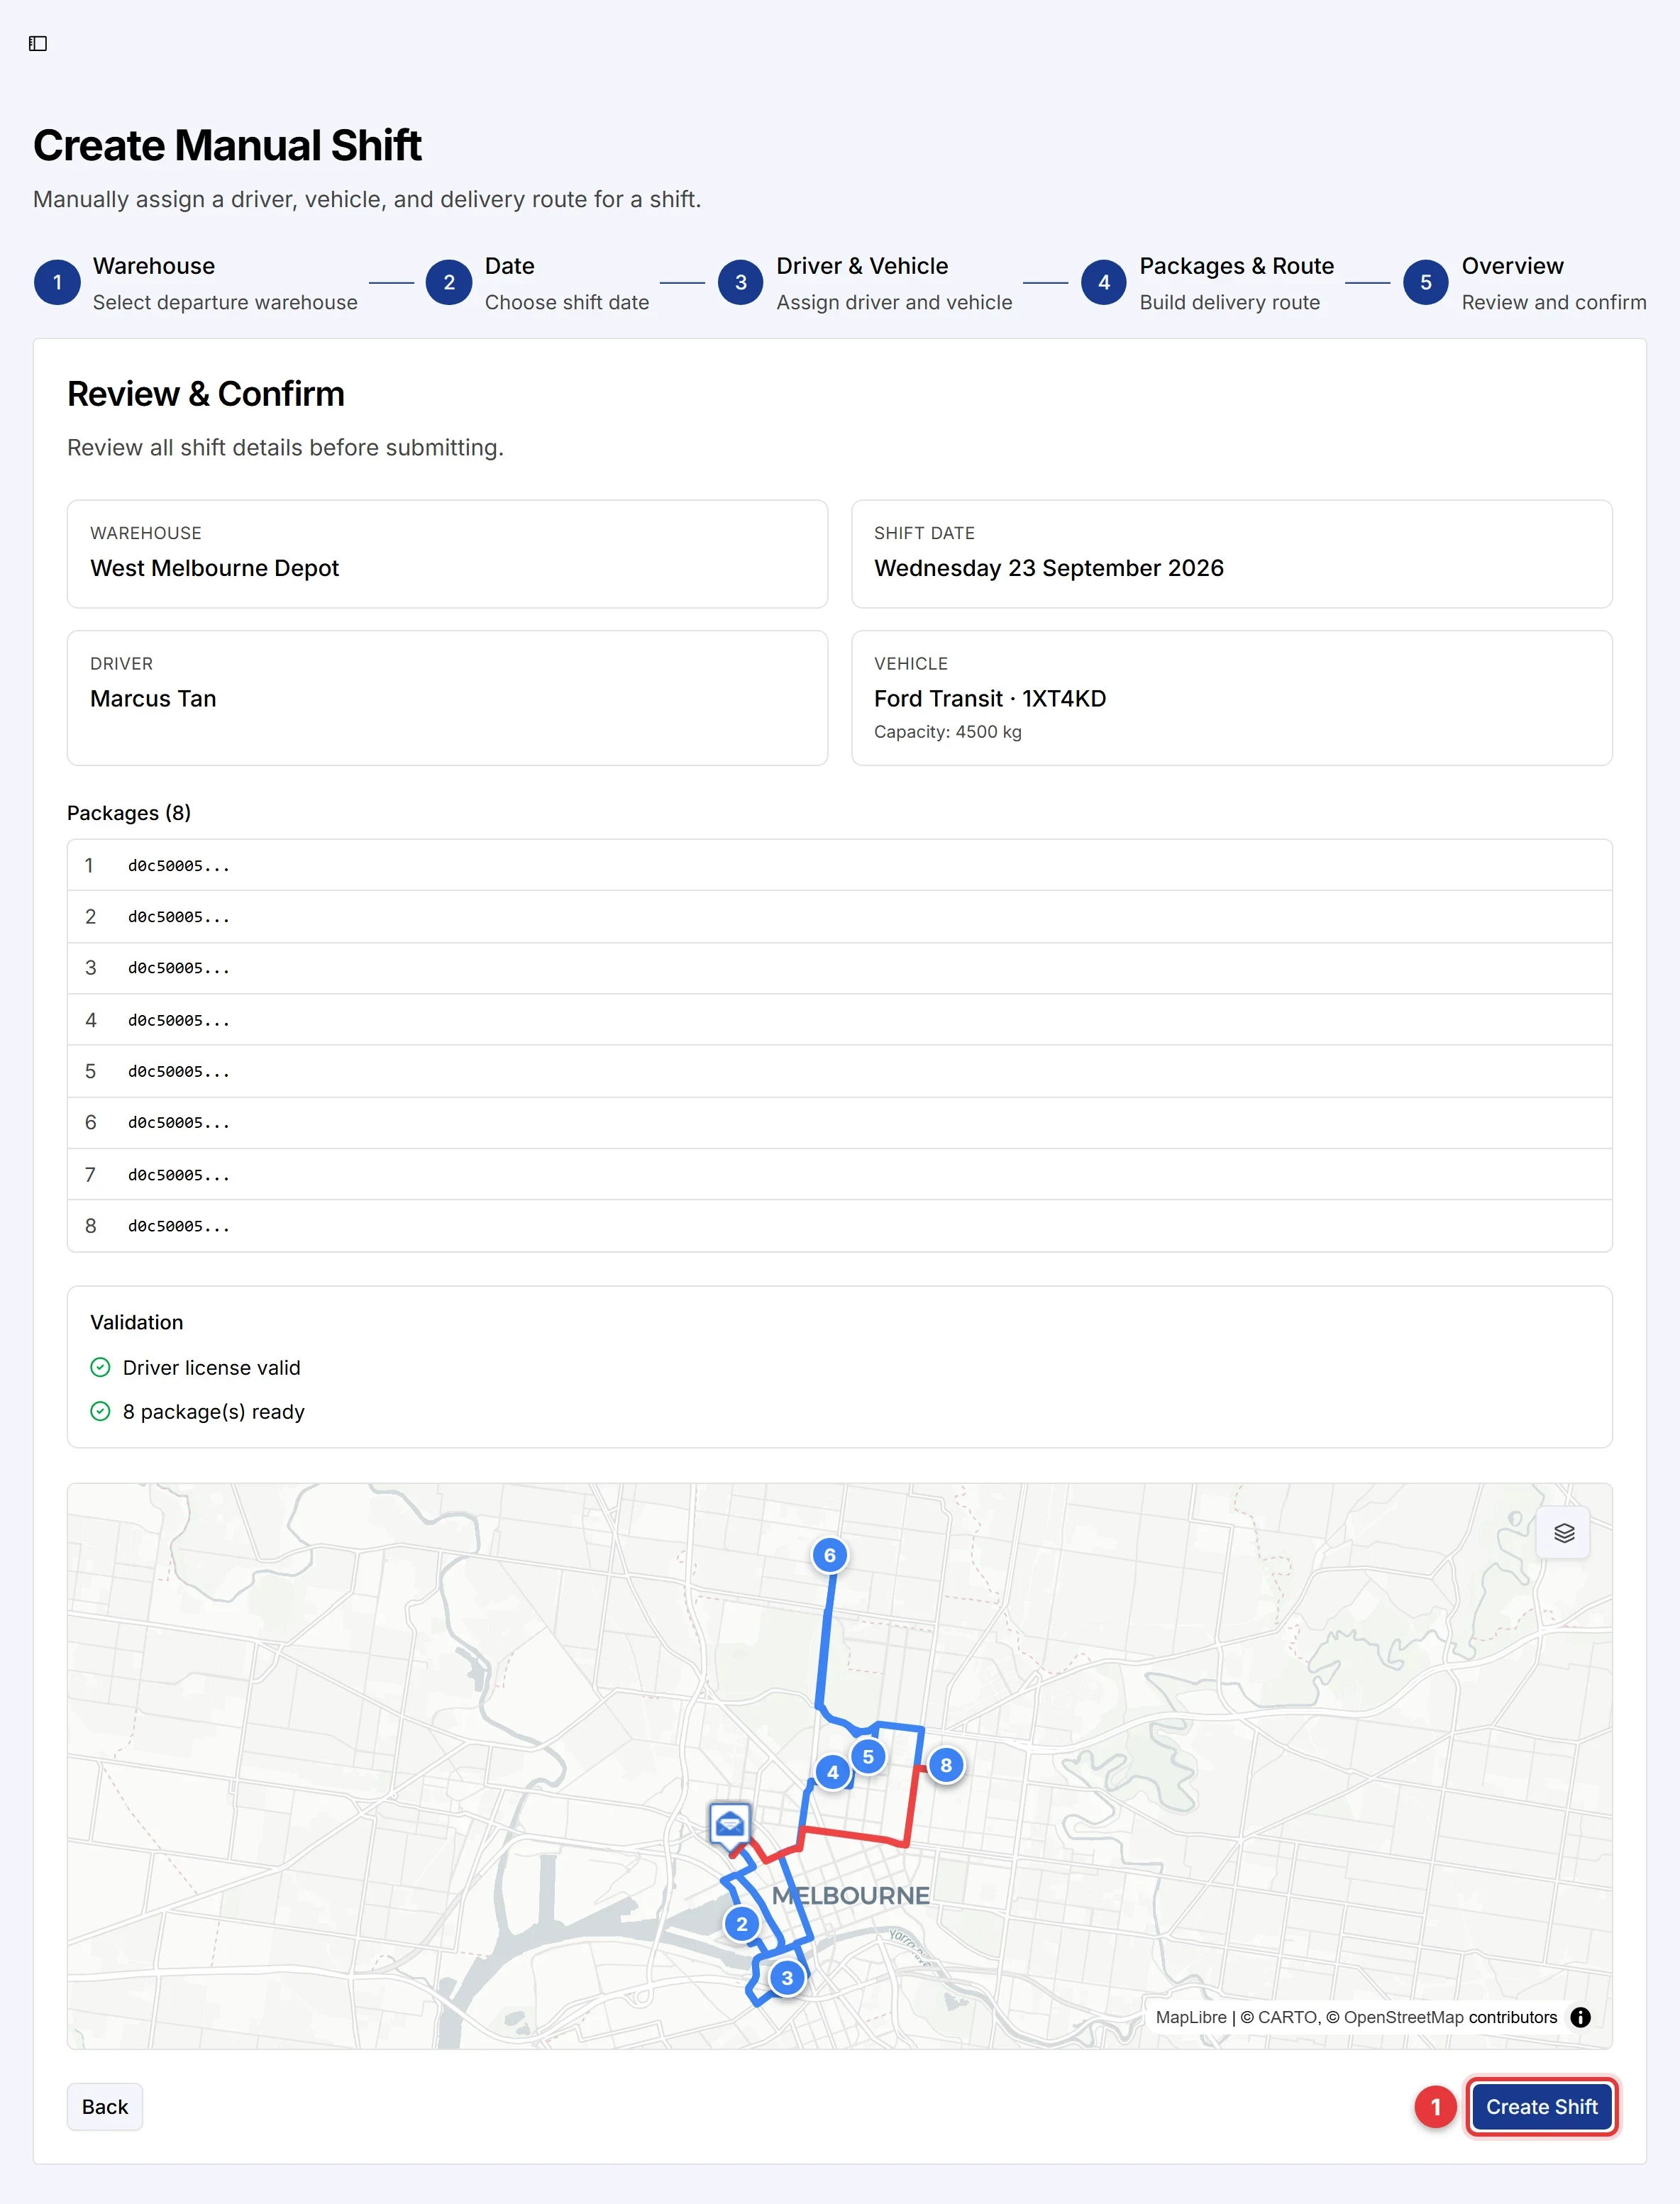
- Make sure that the warehouse, date, driver, vehicle and packages are correct. Validation shows the checks on the licence and the packages.
- Click Create Shift.
Hikyaku opens the new shift. It does not add a package that the vehicle cannot carry, for example a package that requires a skill that the vehicle does not have. That package stays Pending.
Each new shift counts against the shift allowance of your organisation. Refer to Settings. If the allowance is used, the review step asks you to add a payment method.
Re-optimise a warehouse
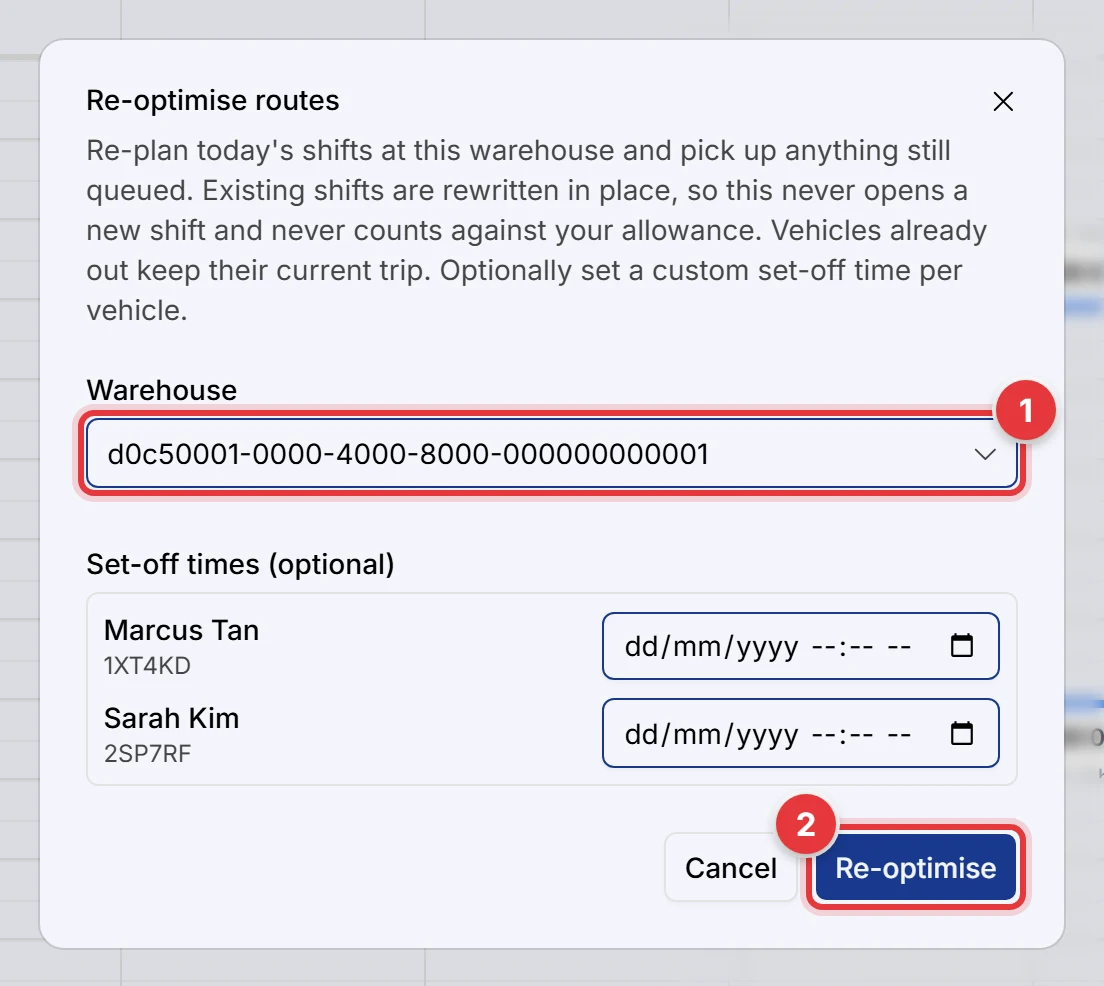
- On the Driver Shifts page, click Re-optimise.
- Select the Warehouse.
- Optional: in Set-off times, set a different start time for a vehicle.
- Click Re-optimise.
Hikyaku solves today's shifts at the warehouse again, and adds packages that are still queued. It changes the existing shifts. It does not make new shifts, so it does not count against your shift allowance. A vehicle that already left the warehouse keeps its current trip.
You can re-optimise once each minute.